Schedule
Last updated: 2026.9.23
Register the planned dates for each process to compare them with actual construction progress and see the progress rate at a glance.
Process hierarchy
Processes have three levels. (Level 1: process group, Level 2: sub-process, Level 3: task)
| Item | Description |
|---|---|
| Process group | The top level, a name that covers similar processes, usually a construction phase Example) Design, Supervision, Building construction, Interior work, Civil works |
| Sub-process | A main trade, meaning a specialized line of work or field Example) Schematic design, Construction supervision, Waterproofing, MEP work, Electrical work |
| Task | A unit of work carried out within a process Example) Scaffolding installation, 2F slab rebar placement, Ready-mixed concrete pouring, System window installation |
Register planned processes
- In the Project > Schedule menu, you can modify the processes to fit the project. You can register the dates for each process and assign workers to it.
Click Modify process.
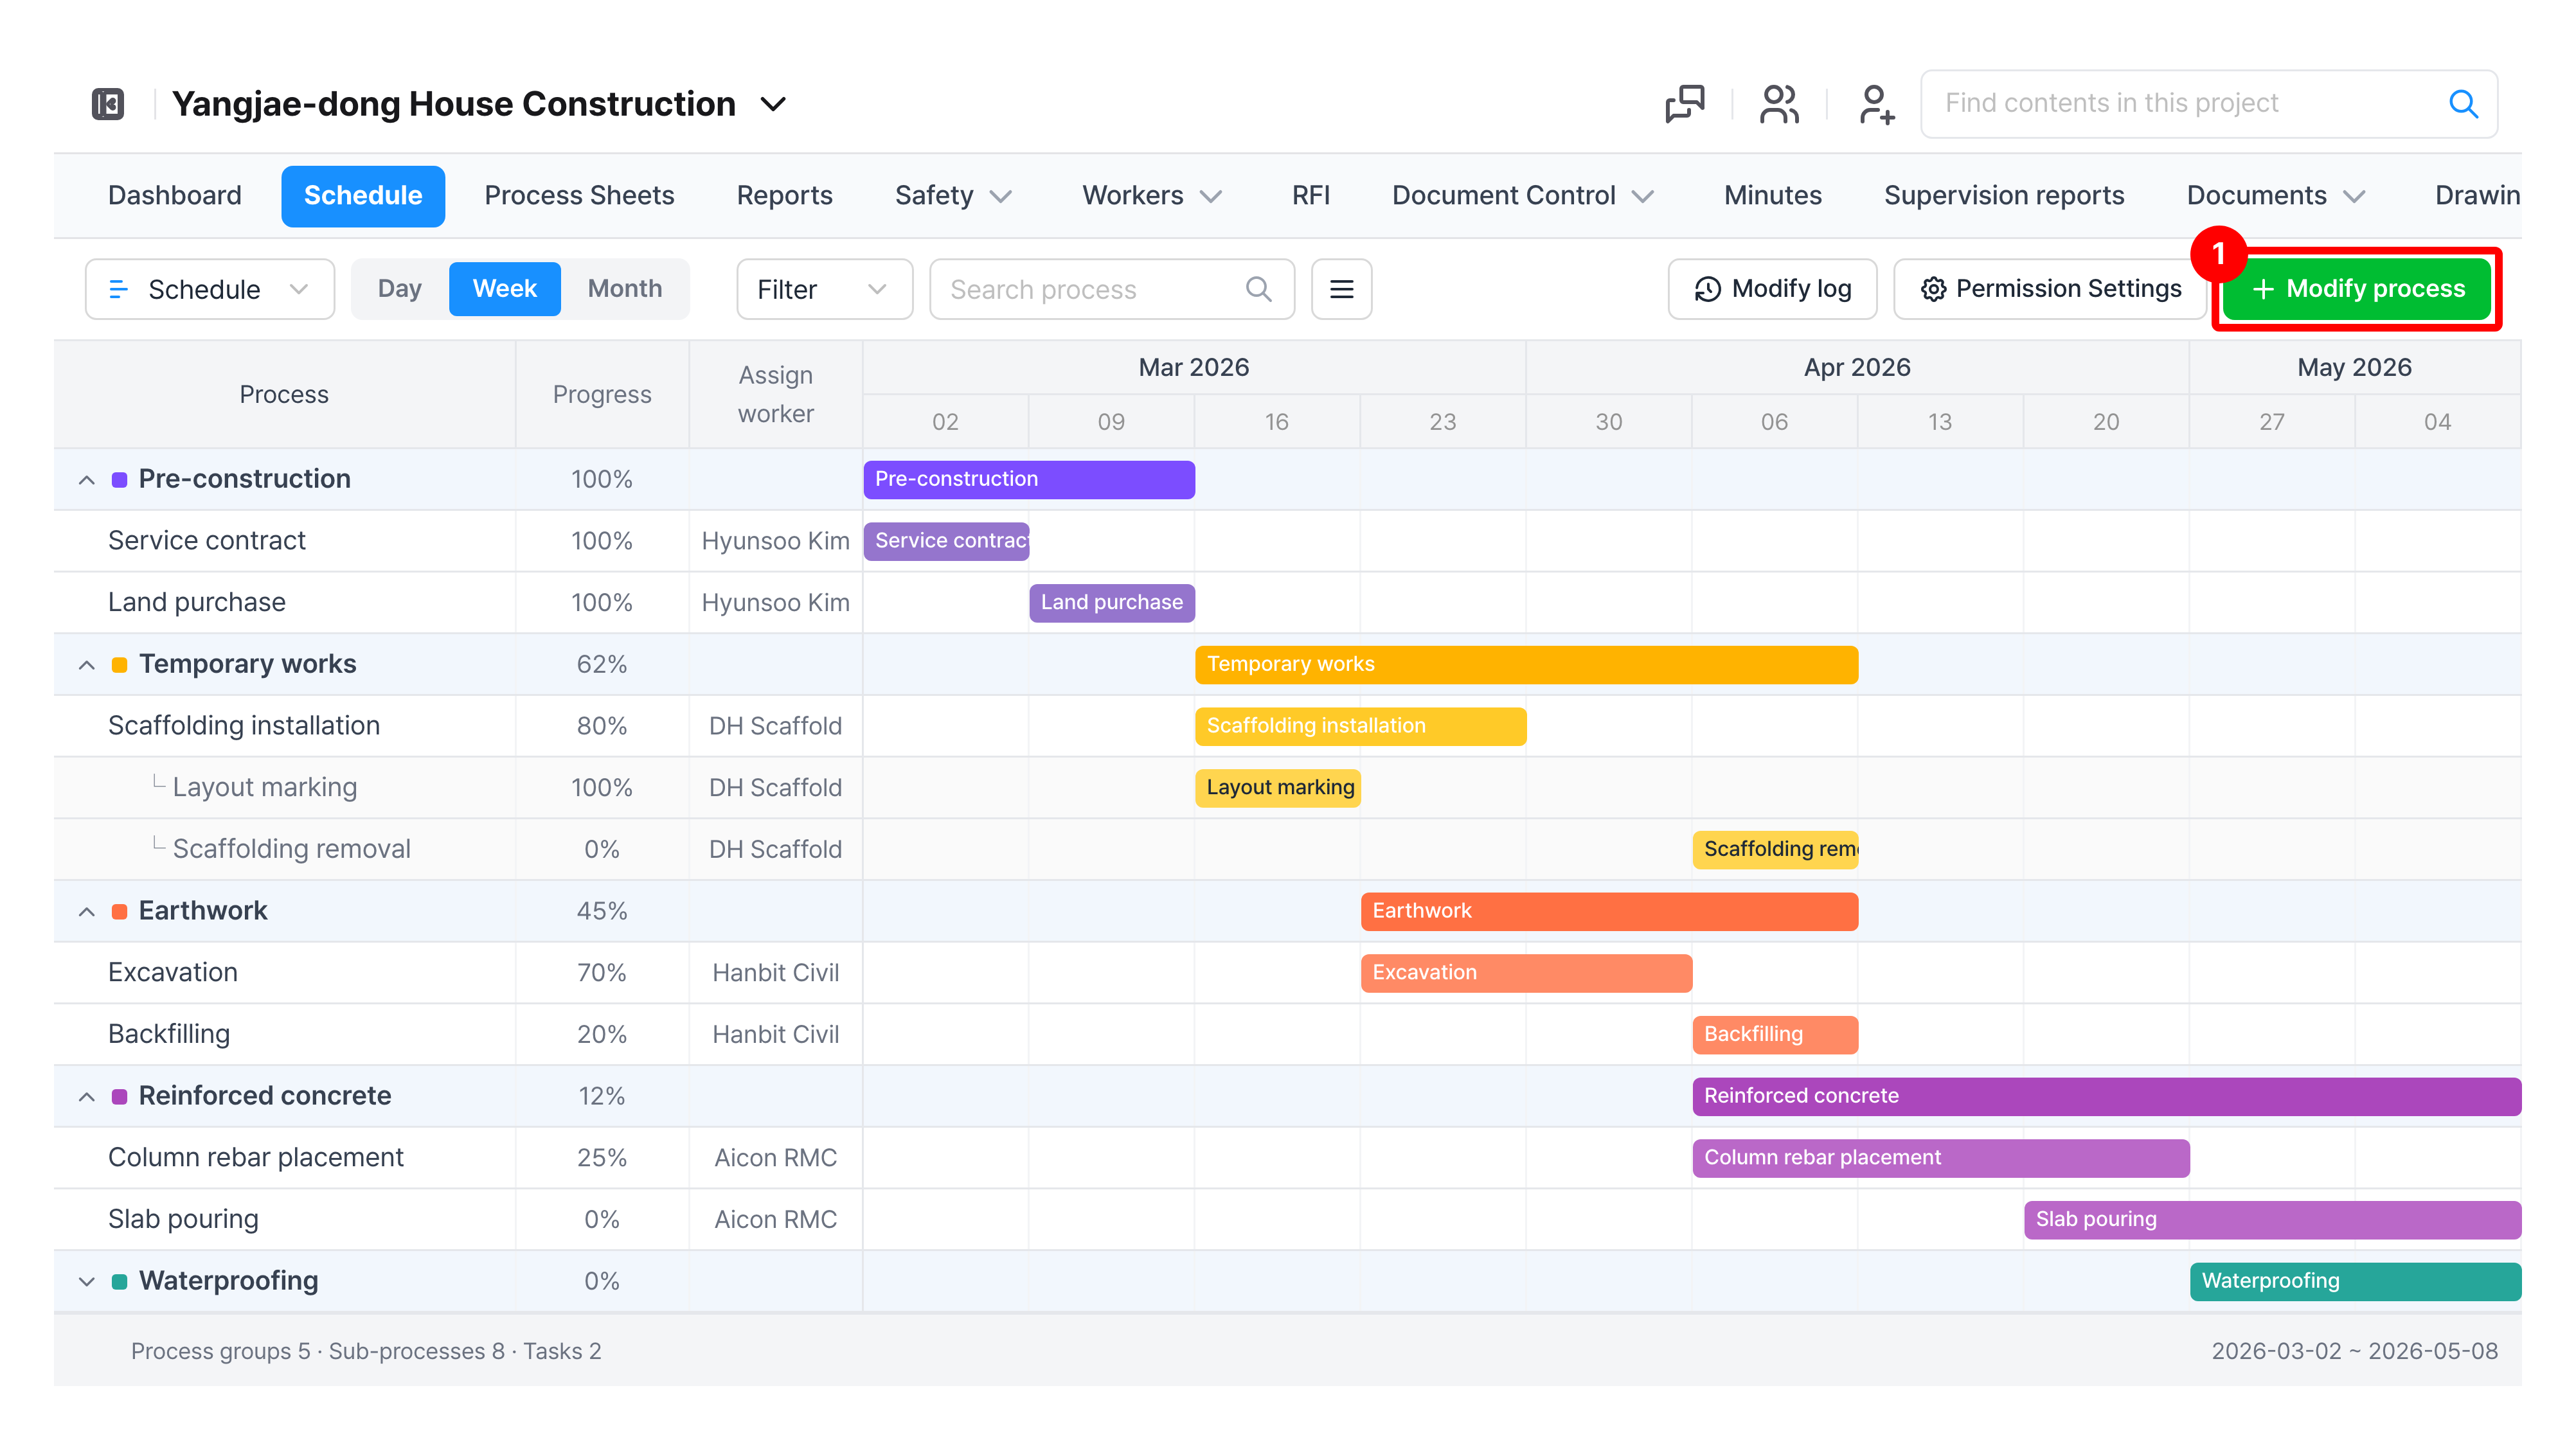
The Modify process screen opens.
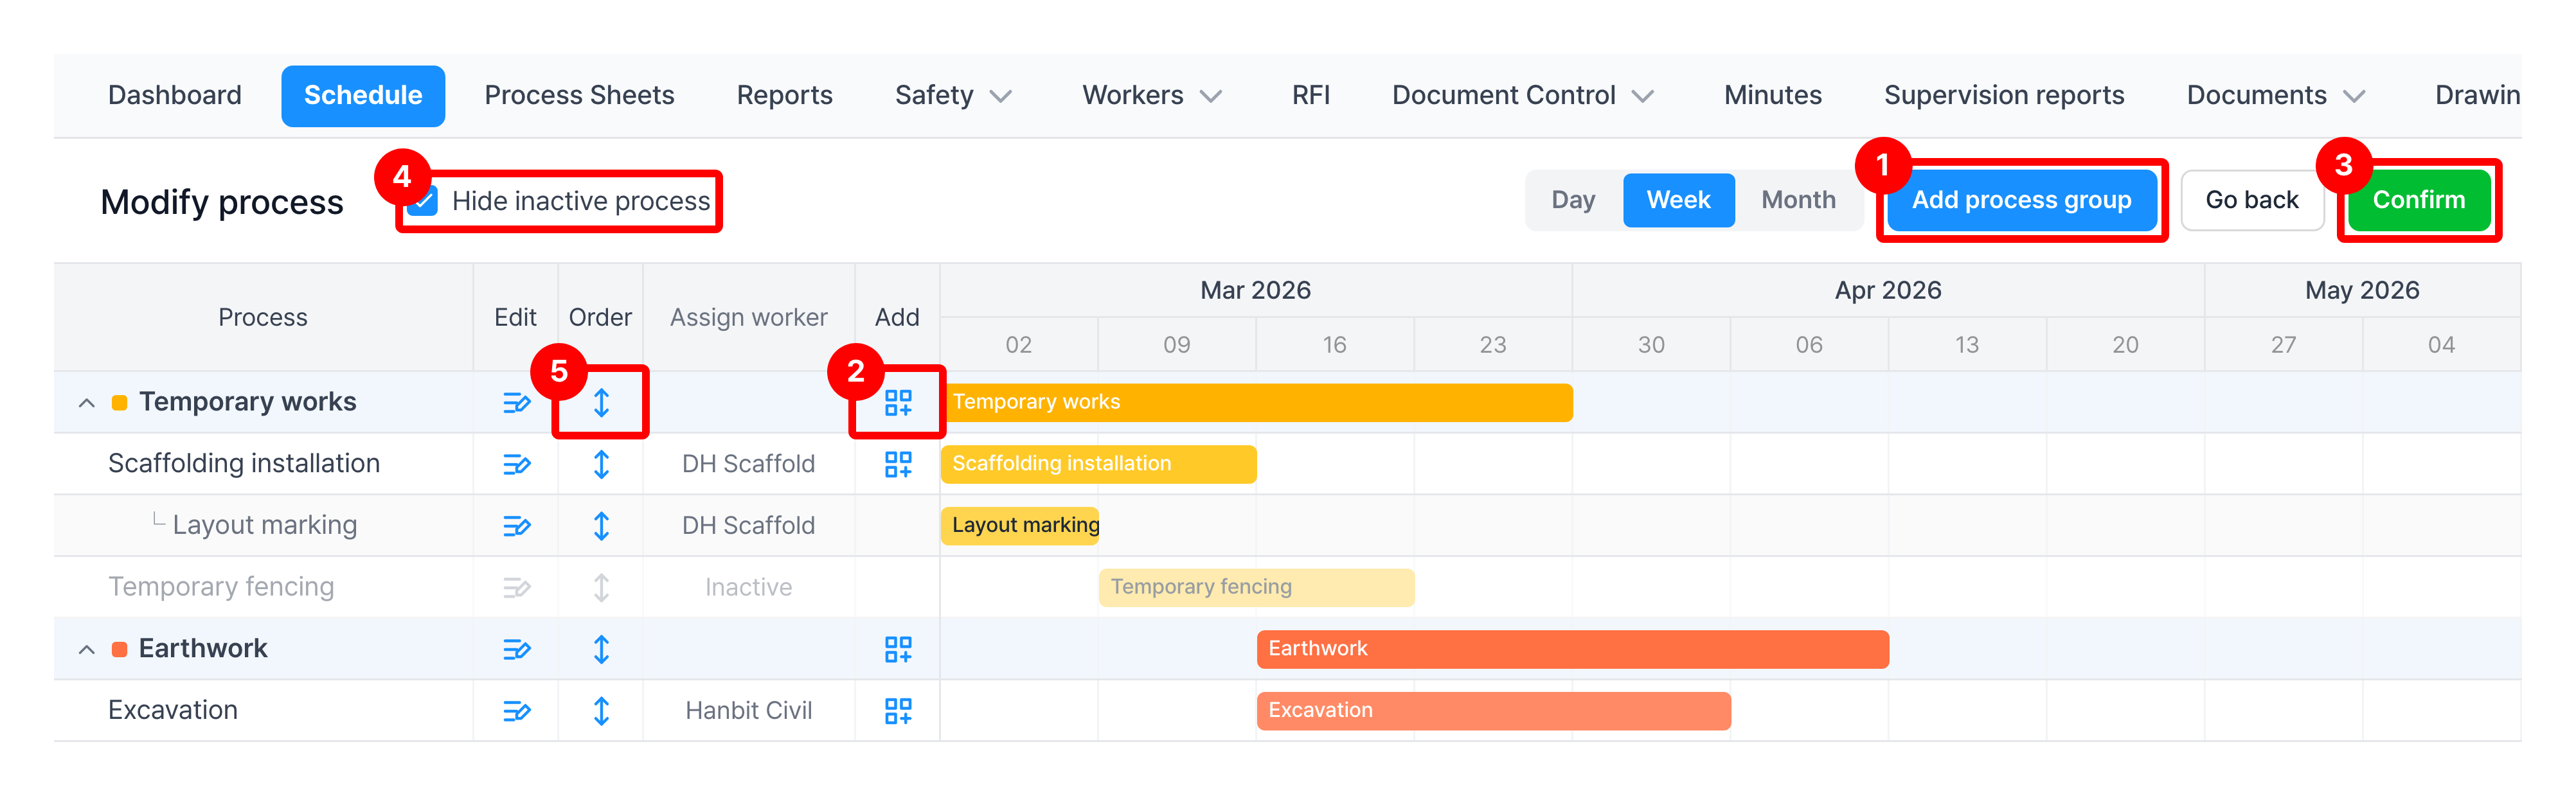
| Item | Description |
|---|---|
| ① Add process group | Creates a new process group |
| ② Add | Adds a sub-process or task below that row |
| ③ Confirm | Saves your changes ※ A window asking for the reason for change opens |
| ④ Hide inactive process | Hides processes you do not use from the list ※ Instead of deleting processes, turn off their activation |
| ⑤ Order | Drag to change the order of processes |
Click Add process group, then set the group name and color.
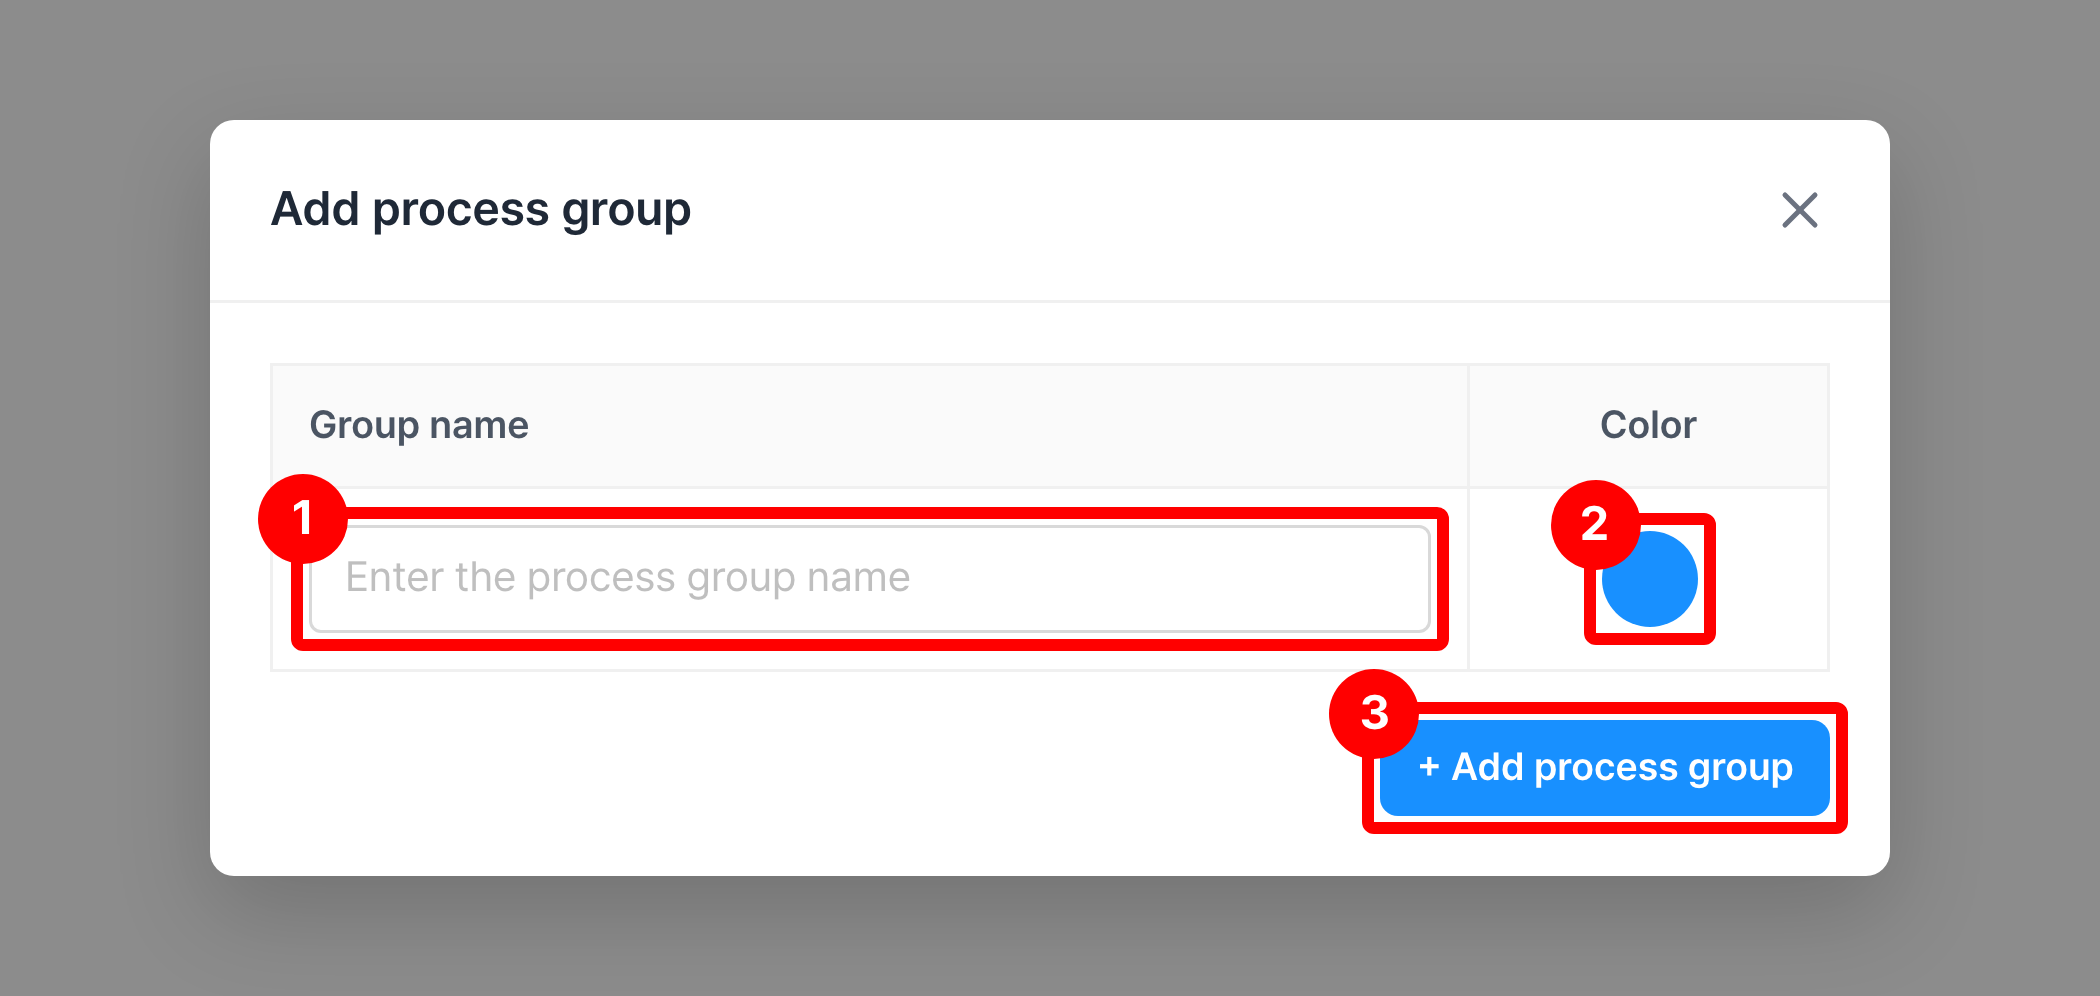
The color becomes the bar color on the schedule. Choosing colors that tell process groups apart makes the schedule easy to read at a glance.
Click the Add icon on the process group row, enter the sub-process information, then click Done.
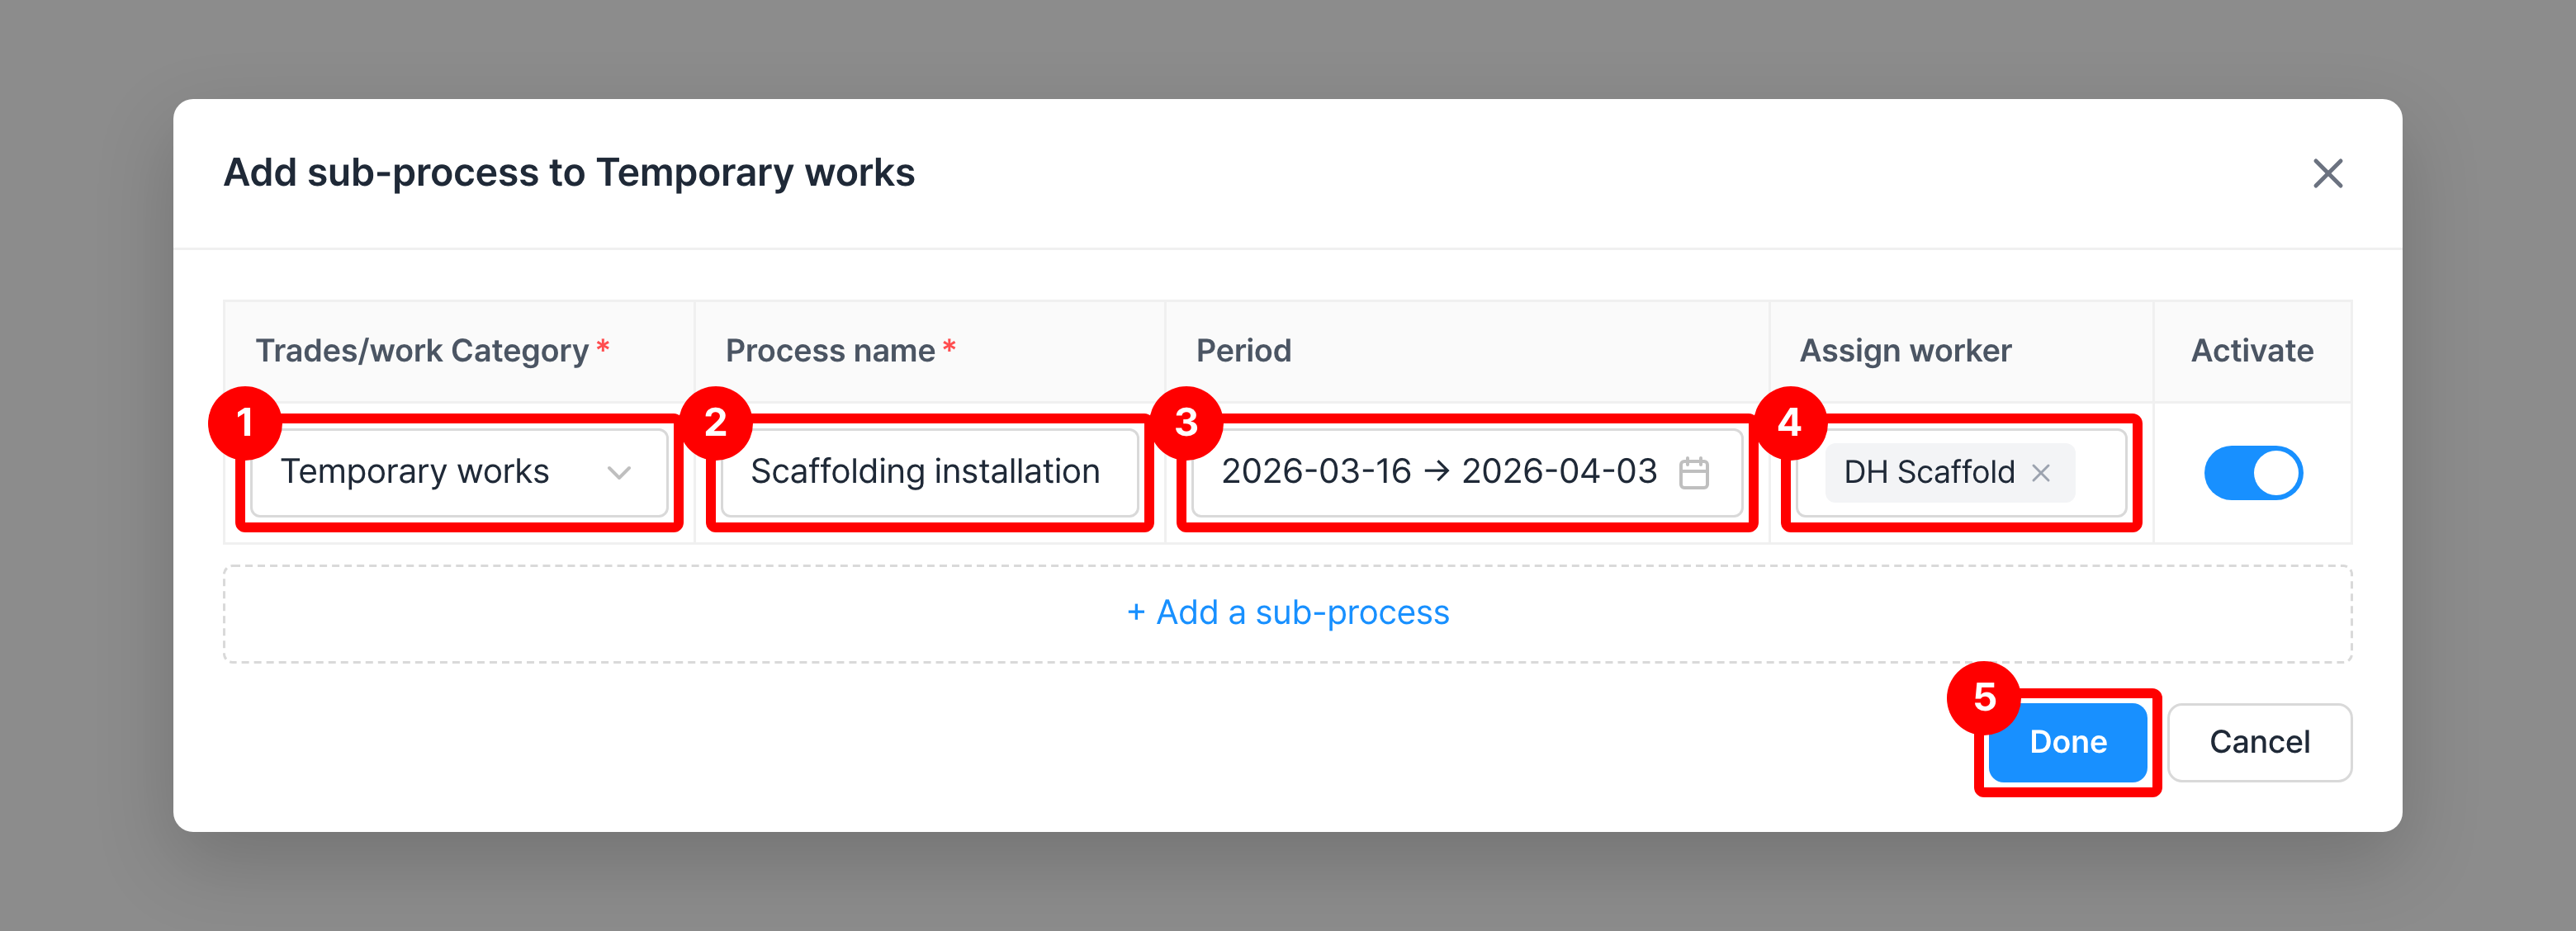
| Item | Description |
|---|---|
| ① Trades/work Category | Search for and select a base process Schematic design, Construction supervision, Structural frame, Waterproofing, MEP work, Electrical work |
| ② Process name | The selected base process is shown automatically as the process name ※ You can change it to any name (Structural frame → Reinforced concrete) |
| ③ Period | Enter the construction period ※ Drag and drop the schedule bar to move it |
| ④ Assign worker | Assign workers to the process (multiple selection allowed) ※ Three ways to assign 1. Select project members 2. Select partner companies (partner companies registered in the partner management menu) 3. Enter directly |
| ⑤ Done | Adds the sub-process you entered to the schedule |
What is a base process?
It is the process classification system provided by CaasWorks. It is used to track and analyze recorded data and make processes more efficient.
Click the Add icon on the sub-process row, enter the task information, then click Done.
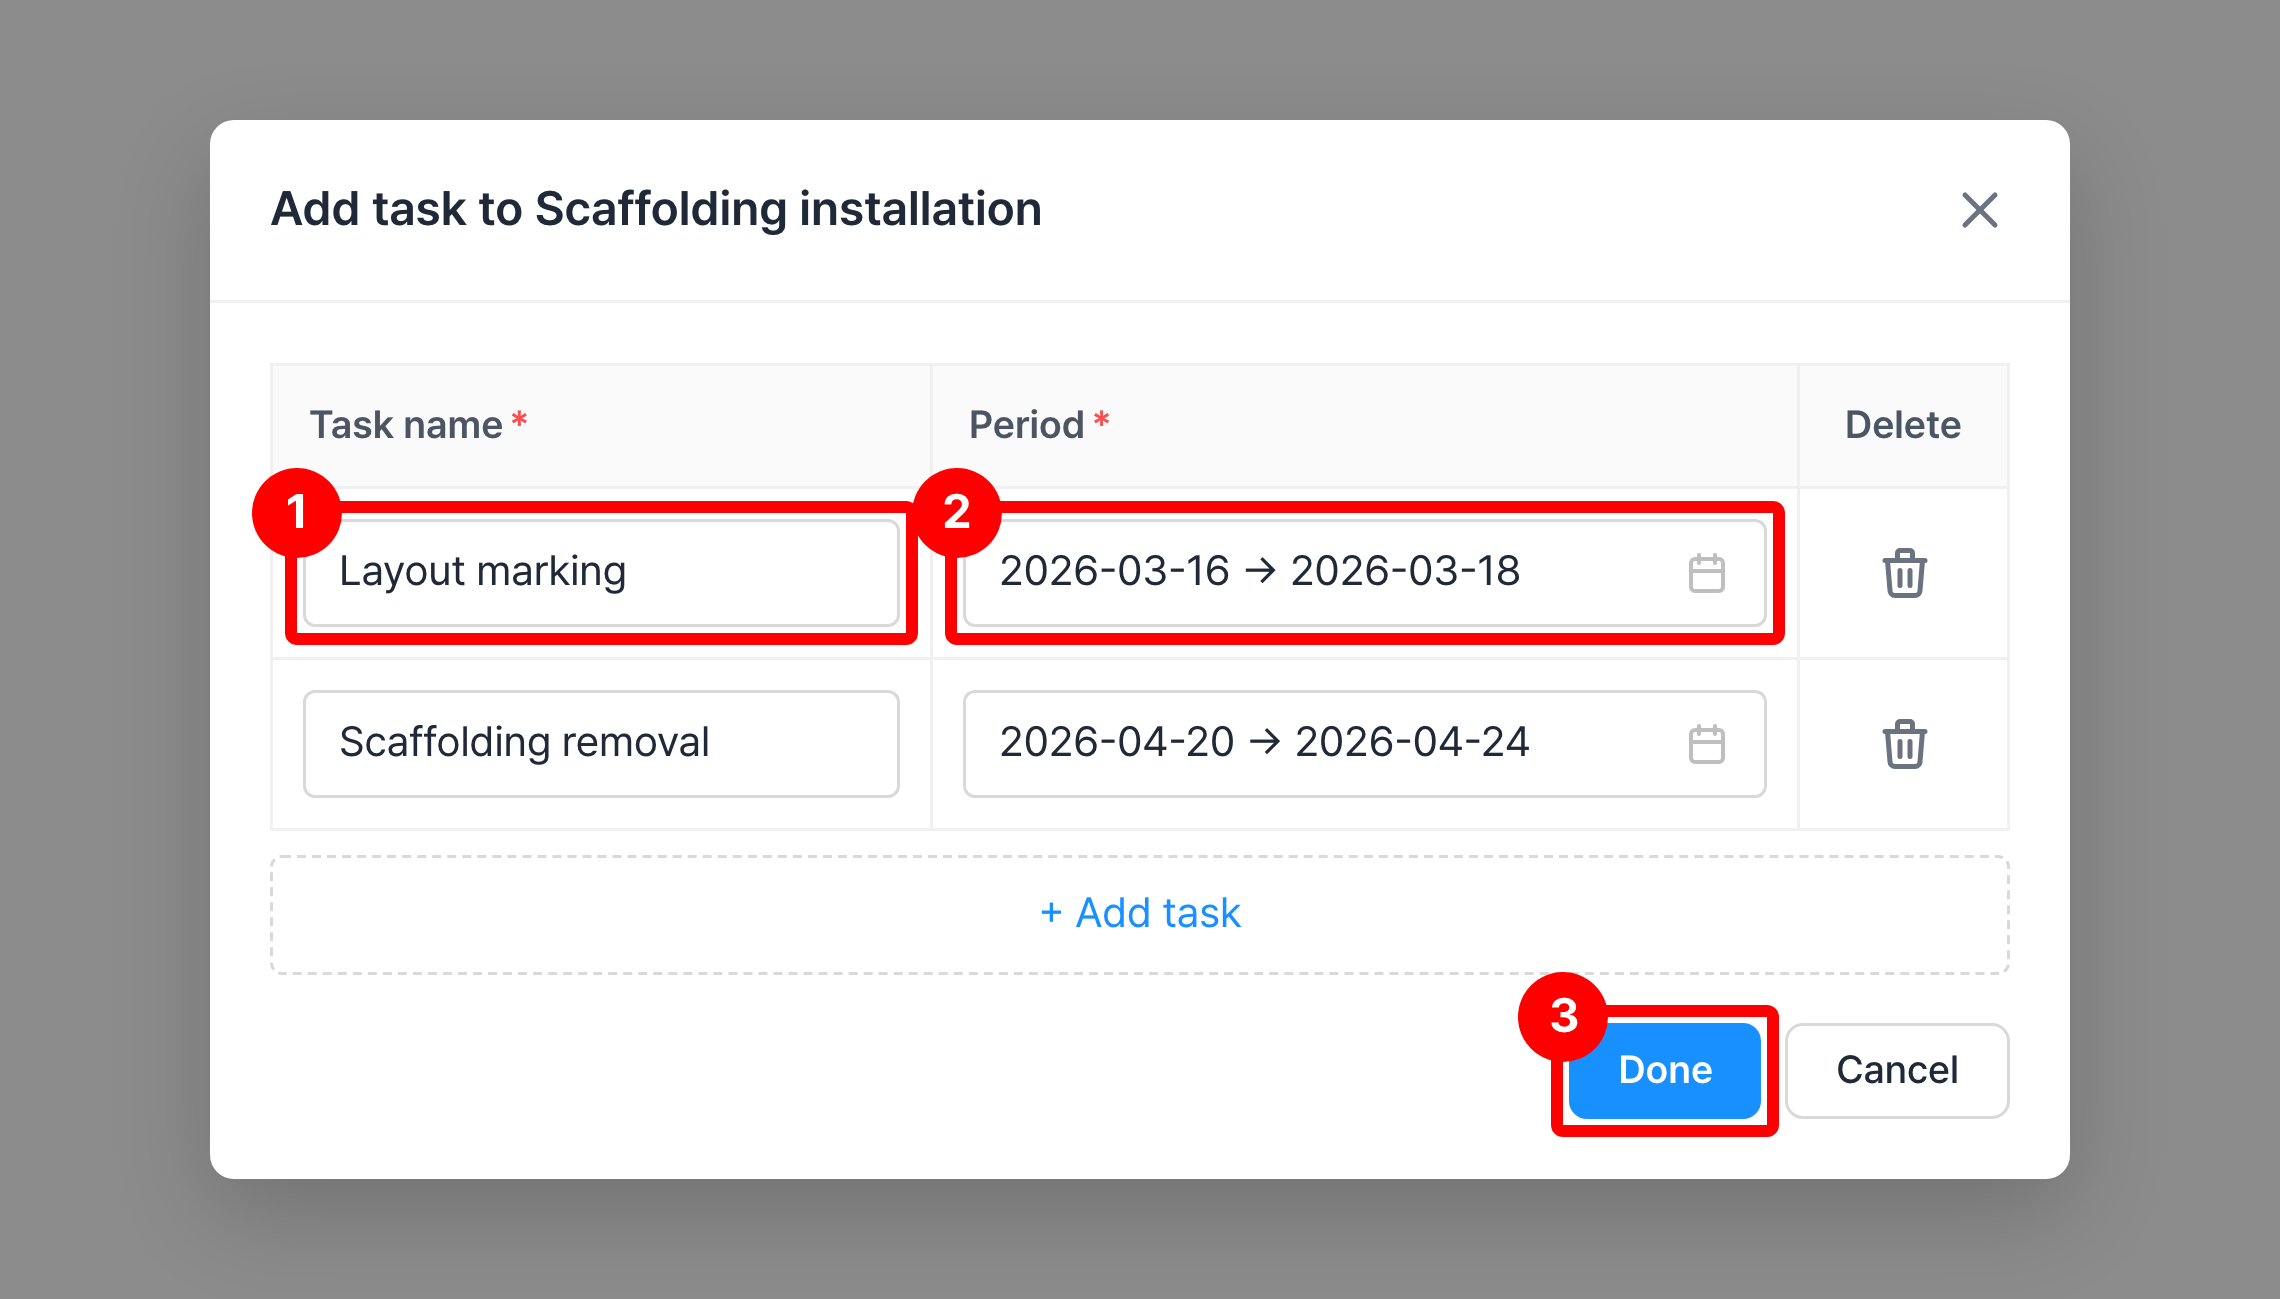
| Item | Description |
|---|---|
| ① Task name | A unit of work carried out within a process For Temporary works: Scaffolding installation, Layout marking, Scaffolding removal |
| ② Period | Enter the construction period ※ Drag and drop the schedule bar to move it |
| ③ Done | Adds the task you entered to the schedule |
You can enter a period for both sub-processes and tasks.
If both a sub-process and its tasks have periods, the task periods are used as the construction period.
Click Confirm, enter the reason for change, then click Done.
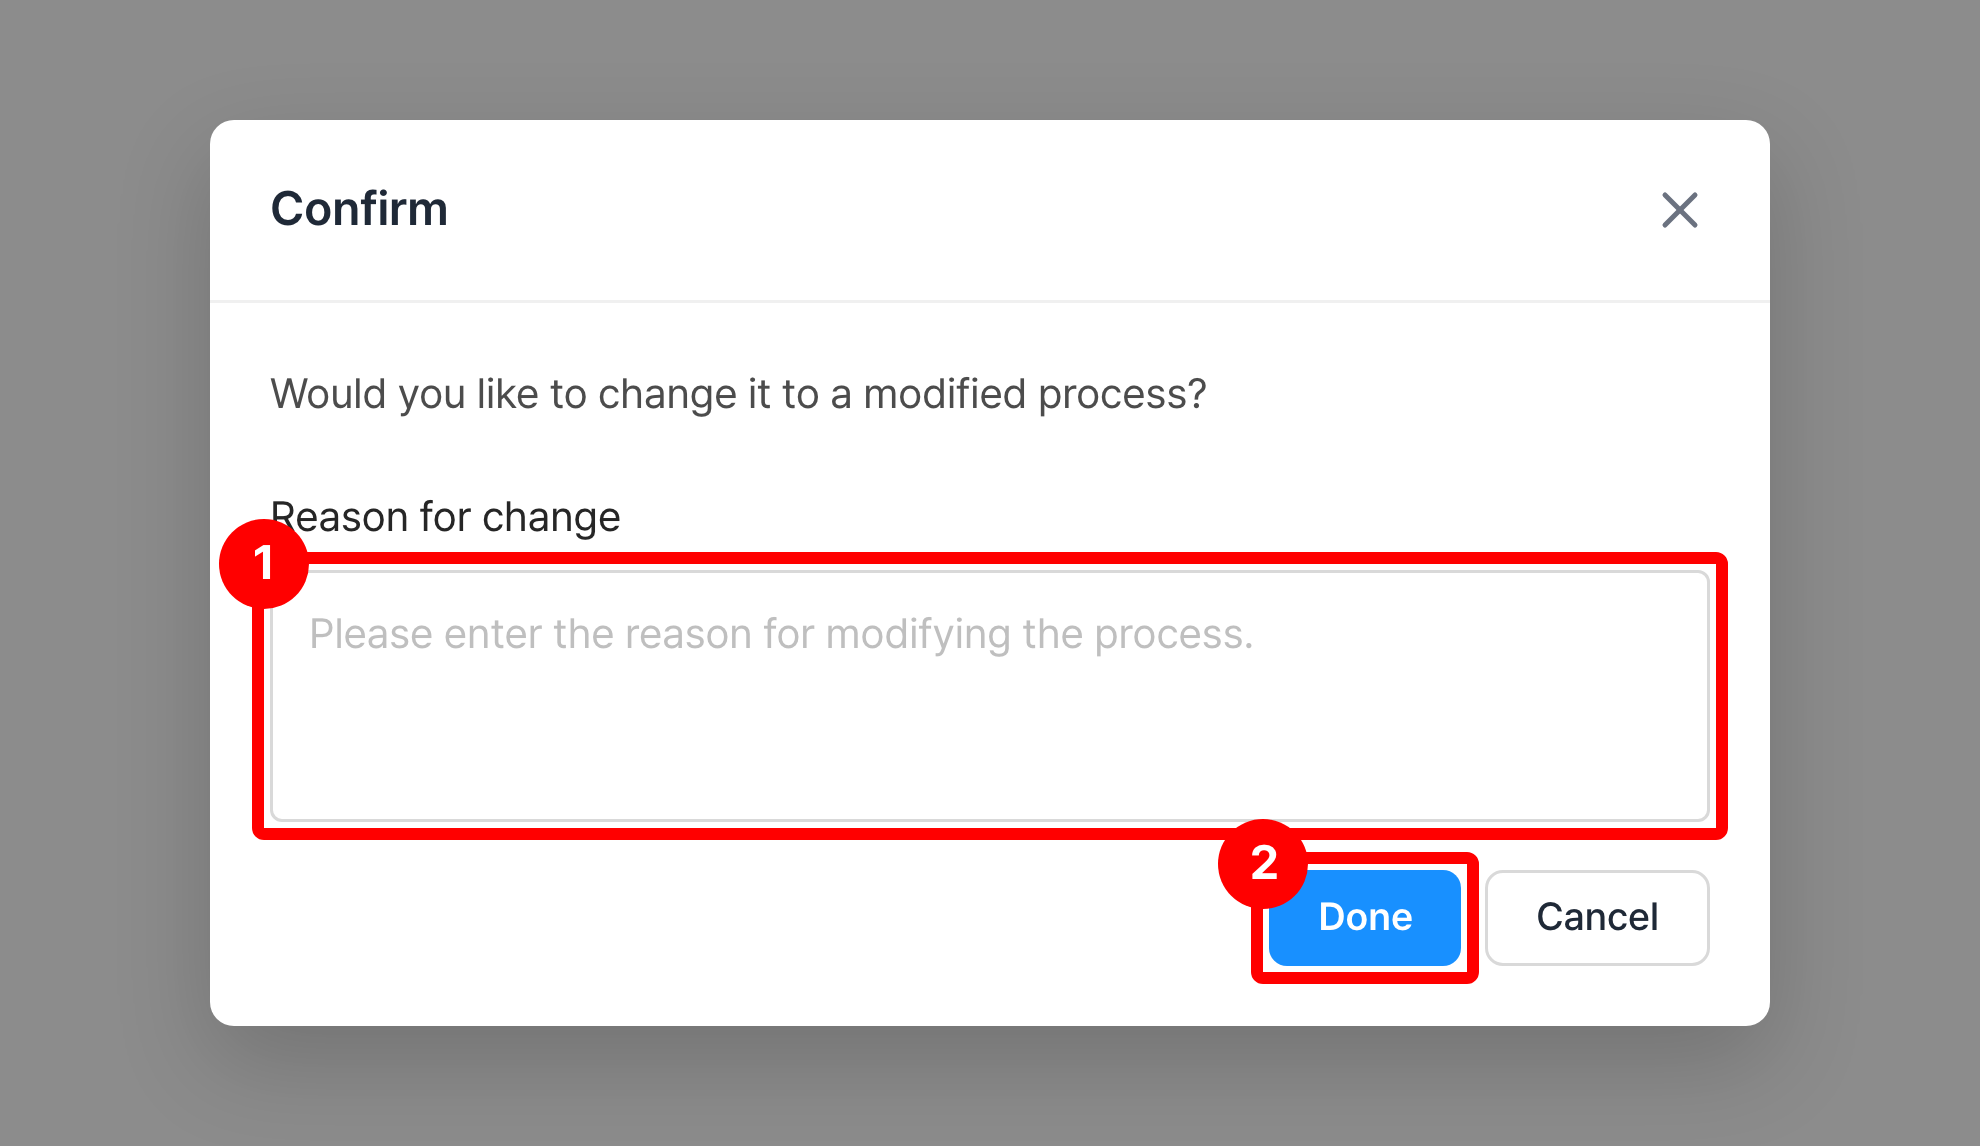
You can see the reason for change in Modify log on the schedule. It is at the top right of the schedule screen.
Sort and hide planned processes
You can tidy up two things on the Modify process screen. The numbers match the Modify process screen image above.
| Item | Description |
|---|---|
| Change order (⑤) | Drag the icon in the Order column to arrange processes in any order. |
| Hide (④) | Turn off activation for process groups and sub-processes you do not use, then check Hide inactive process to hide them from the list. |
Check construction progress
Register the planned dates for each process to compare them with actual construction progress and see the progress rate at a glance.
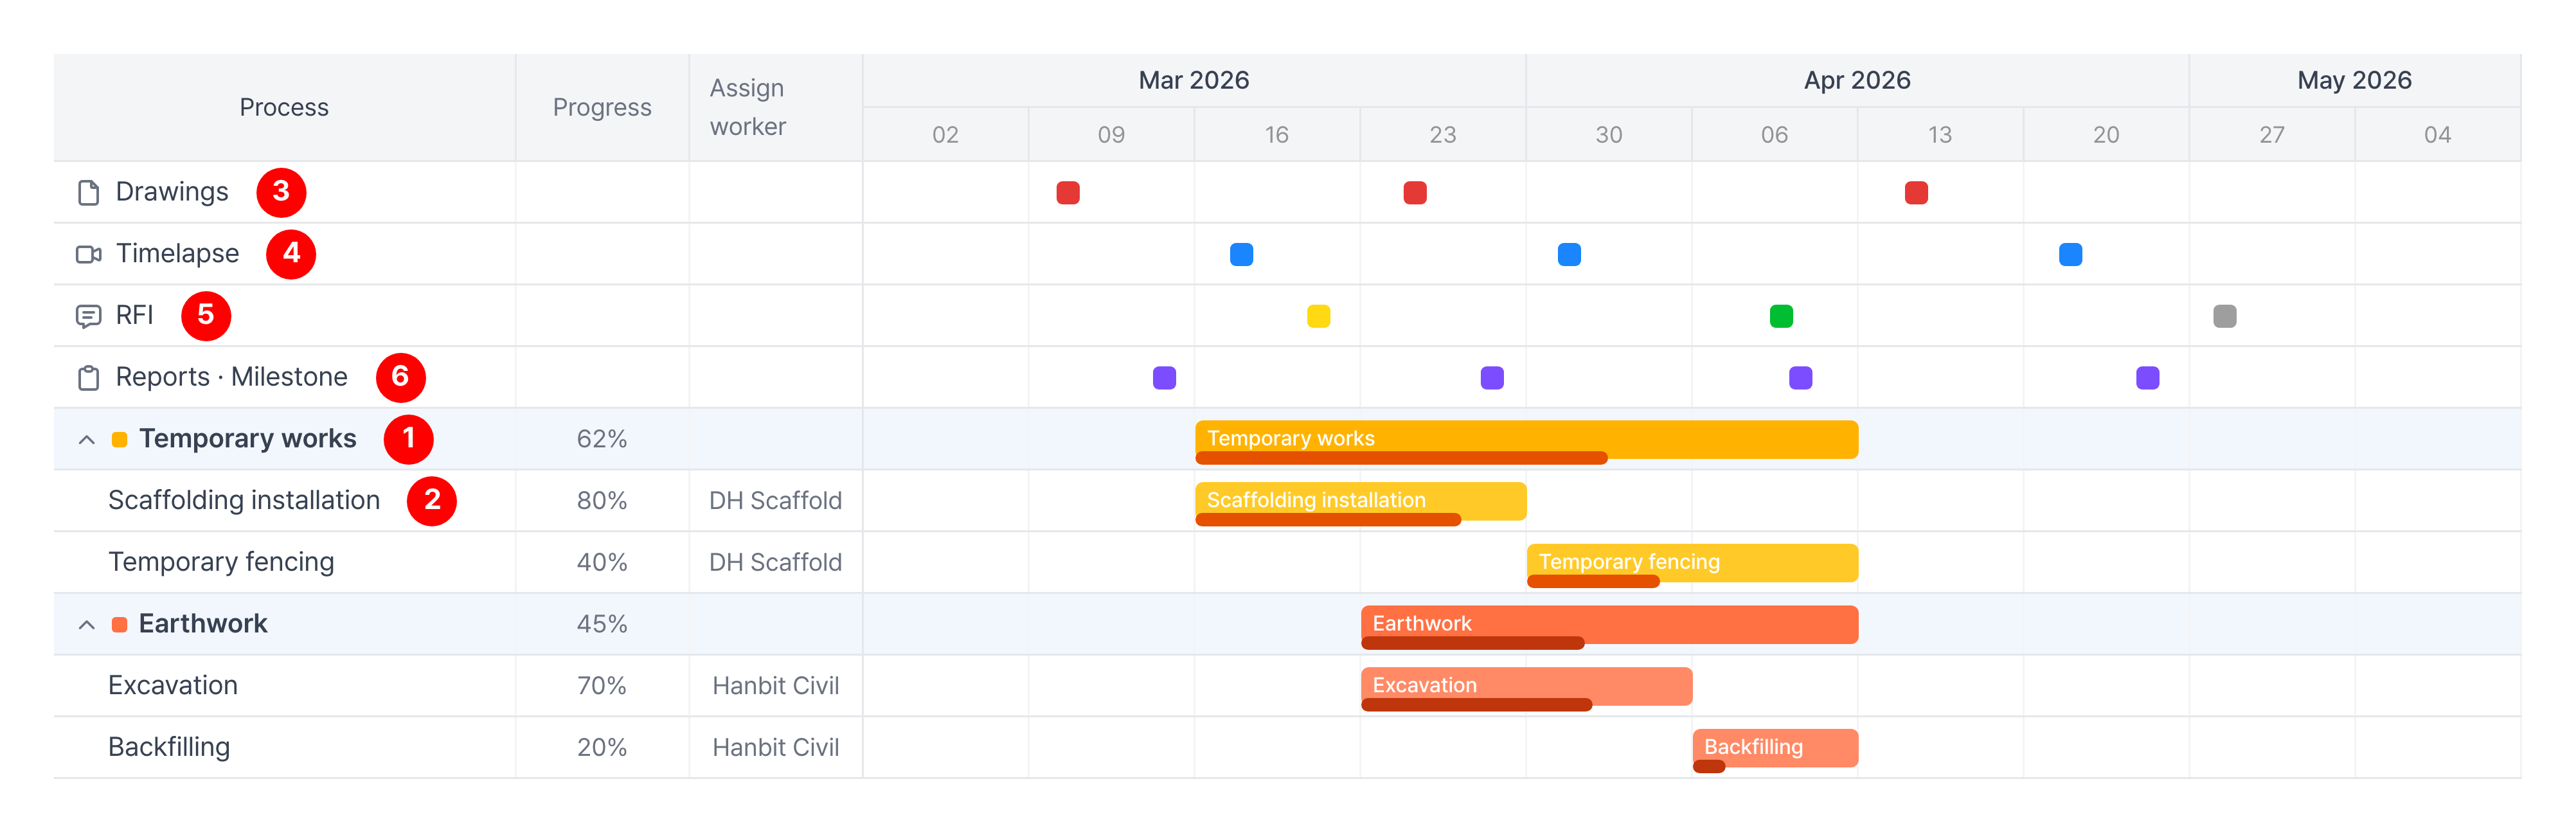
| Item | Description |
|---|---|
| ① Planned process | The planned process dates |
| ② Actual process | Shows the dates on which work on that process took place |
| ③ Drawings | Shows the dates drawings were registered (you can open drawing details) |
| ④ Timelapse | Previews timelapse videos by date |
| ⑤ RFI | Previews RFIs by due date ※ Colors differ by request status (Awaiting > In progress > Completed > On hold) |
| ⑥ Reports | Shows the dates on which work on that process took place (you can open work report details) |