Reports
Last updated: 2023.4.14
Write work reports to share them with project members and check whether construction is going as planned.
Write a work report
- In the Project > Reports menu, you can write work reports organized by process.
The writing screen is split into two columns. The left column holds the report information and work details, and the right column holds the headcount and materials used for each process.
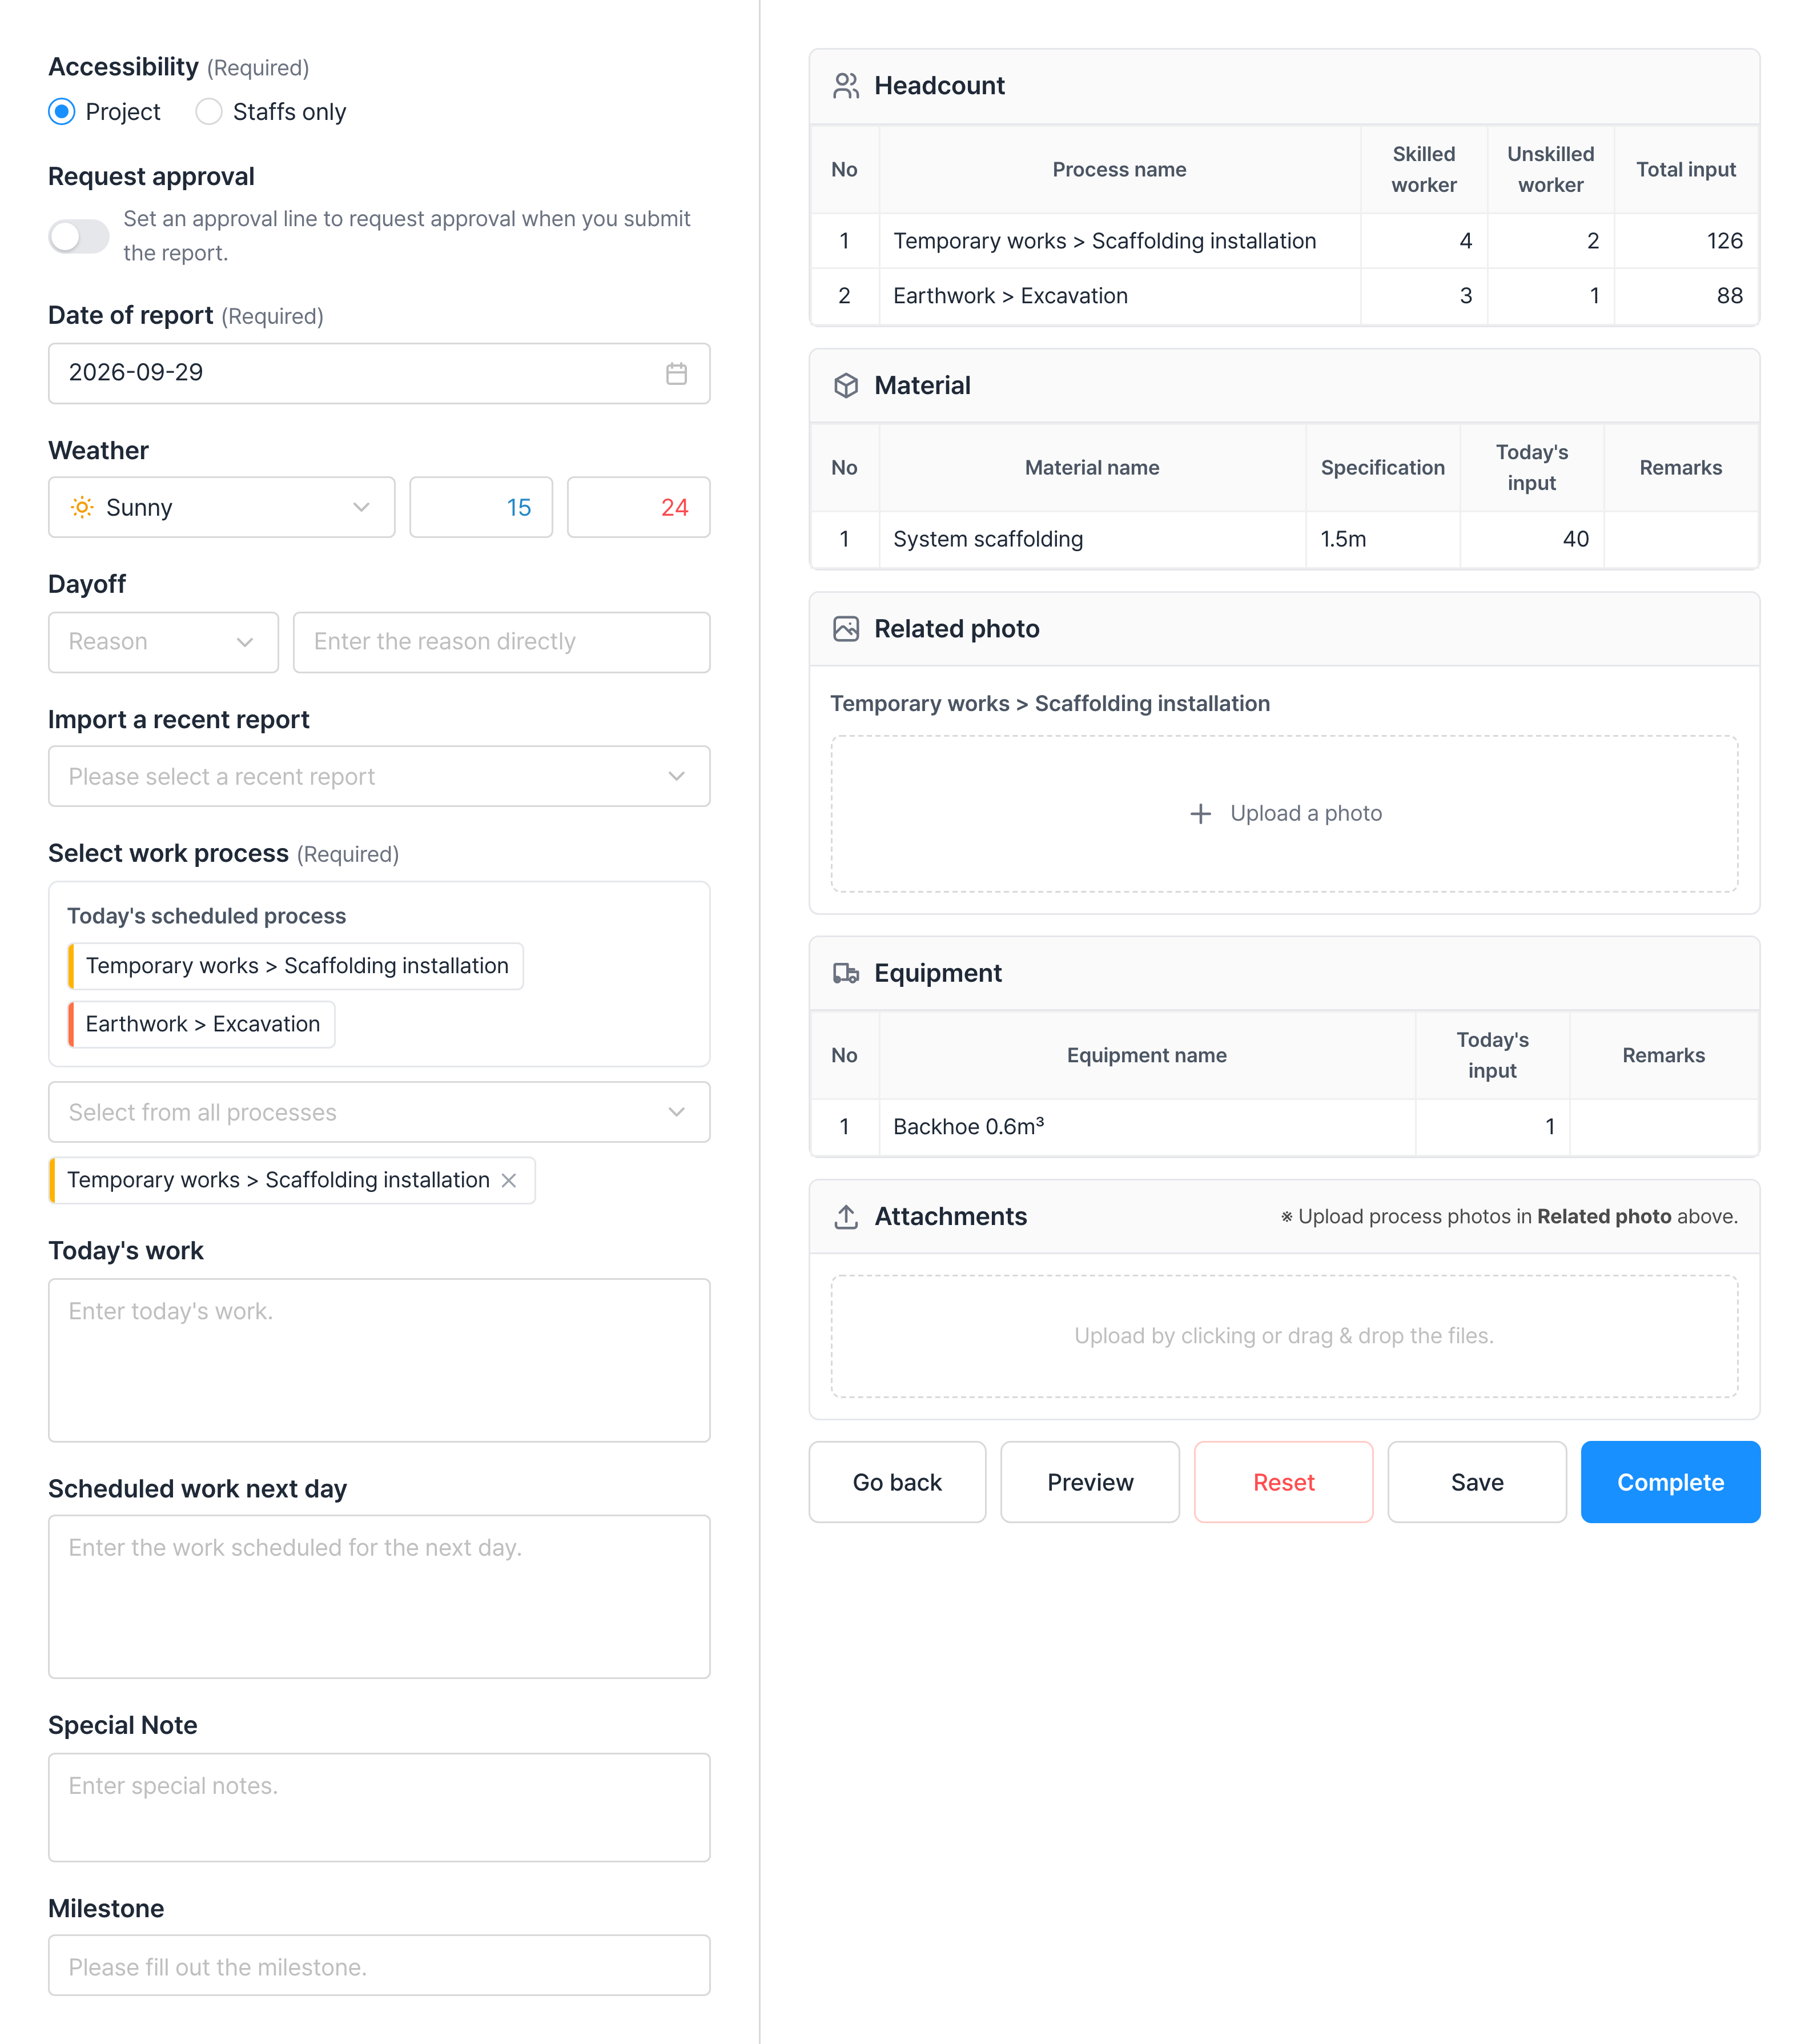
Fill in the report information and work details in the left column.
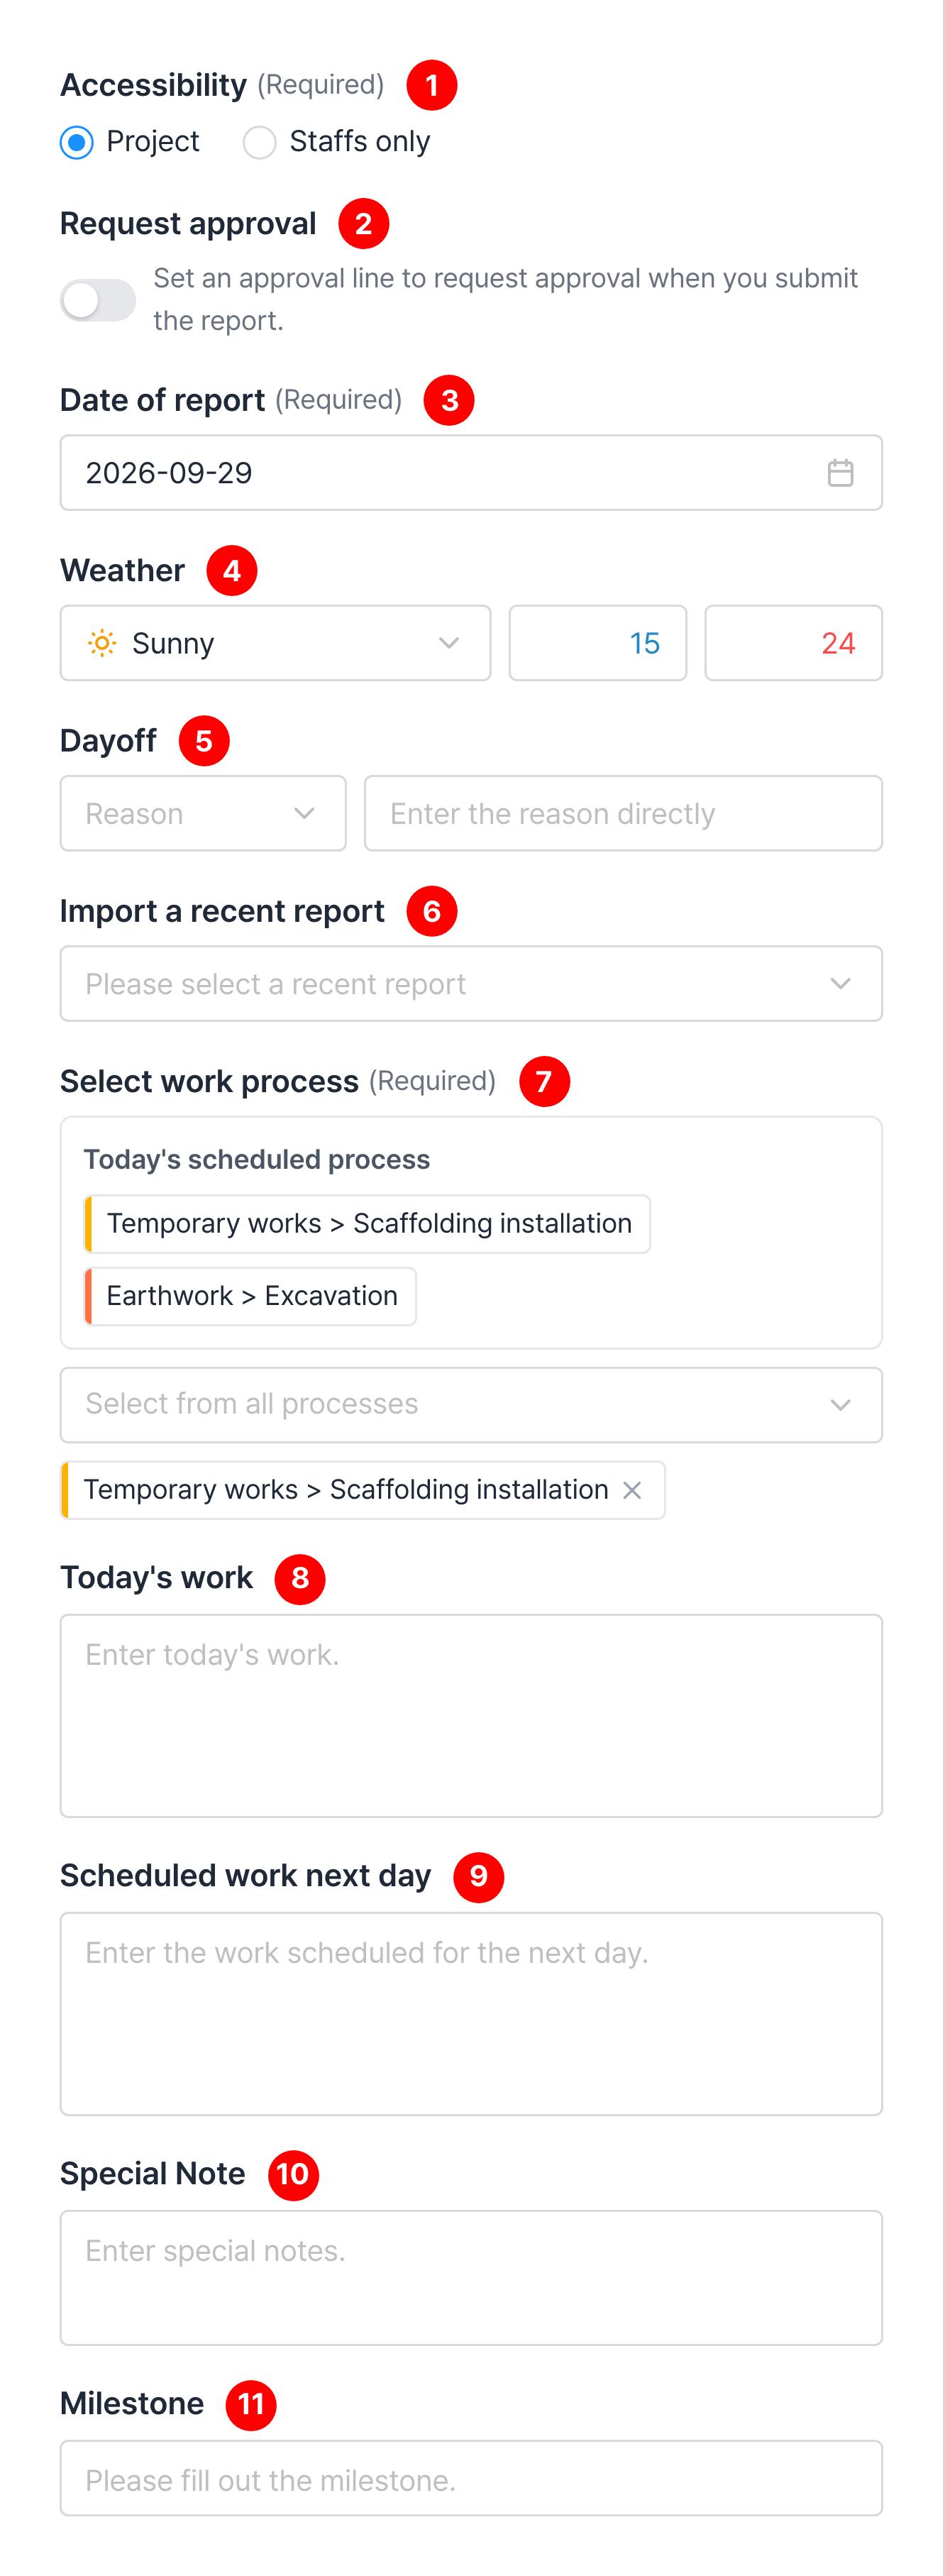
| Item | Description |
|---|---|
| ① Accessibility | Set who can see the work report - Project: all project members can view - Staffs only: only your company's employees can view |
| ② Request approval | If you set an approval line, the approval request is sent when you submit the report |
| ③ Date of report | Defaults to today; click the date to change it |
| ④ Weather | Select the weather and enter the low and high temperatures |
| ⑤ Dayoff | On a day off, select a reason or enter one directly |
| ⑥ Import a recent report | Brings in the contents of a previous work report to edit |
| ⑦ Select work process | Select from Today's scheduled process, or select the processes worked on today from all processes ※ Today's scheduled process is shown only when processes are planned for the report date |
| ⑧ Today's work | Enter the work details |
| ⑨ Scheduled work next day | Enter the work planned for the next day ※ When you write the next work report, this is filled in automatically as Today's work |
| ⑩ Special Note | Enter issues that came up on site today |
| ⑪ Milestone | Enter major events in the course of the project Example) Foundation pour, floor screed pour, window installation |
Fill in what was used for each process in the right column, then click Complete.
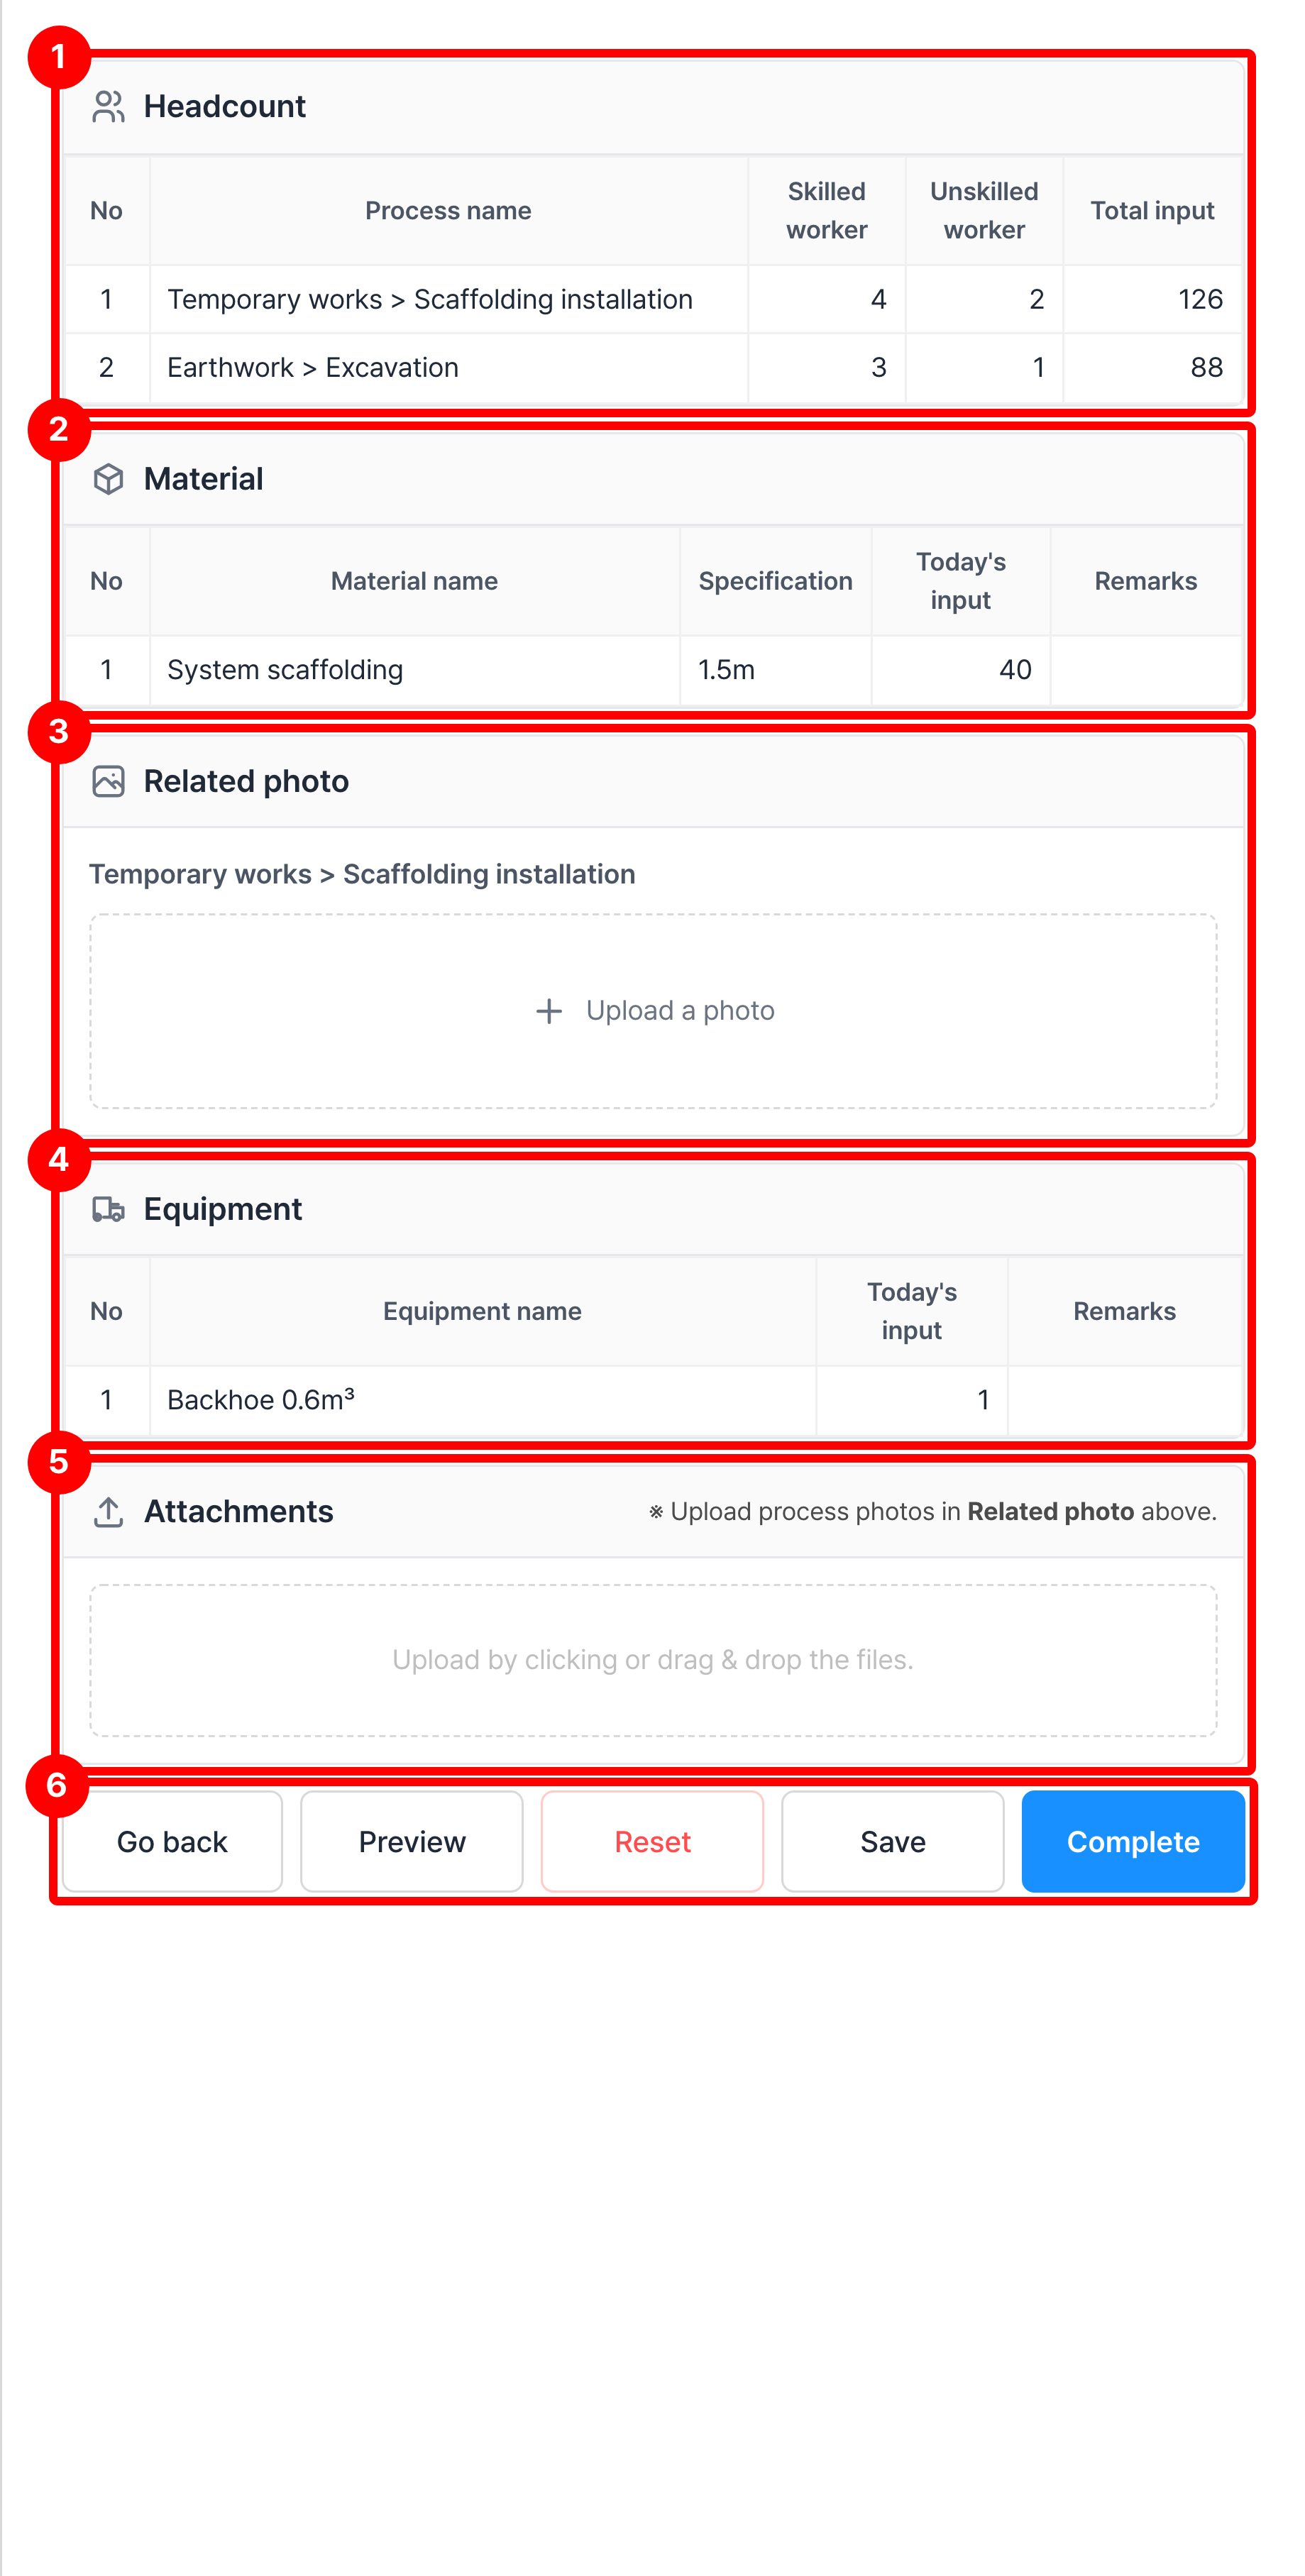
| Item | Description |
|---|---|
| ① Headcount | Enter the number of skilled and unskilled workers for each process ※ Three ways to enter a trade name 1. Select a trade name for the process provided by CaasWorks 2. Select a worker assigned to the process 3. Enter directly |
| ② Material | Enter the material name, specification, and quantity delivered today |
| ③ Related photo | Upload work photos for each process ※ Photos taken on site with the mobile app appear automatically |
| ④ Equipment | Enter the equipment name and the number of units used today ※ Two ways to enter an equipment name 1. Select a common equipment name provided by CaasWorks 2. Enter directly |
| ⑤ Attachments | Attach documents other than photos ※ Upload process photos in ③ |
| ⑥ Complete | Submits the work report ※ You can save first with Save and continue writing later |
Automatic work report generation
When the conditions below are met, the system generates a work report automatically. This saves the site manager from writing a work report by hand every time.
Turn on automatic work report generation in the Project > Settings > Features menu.
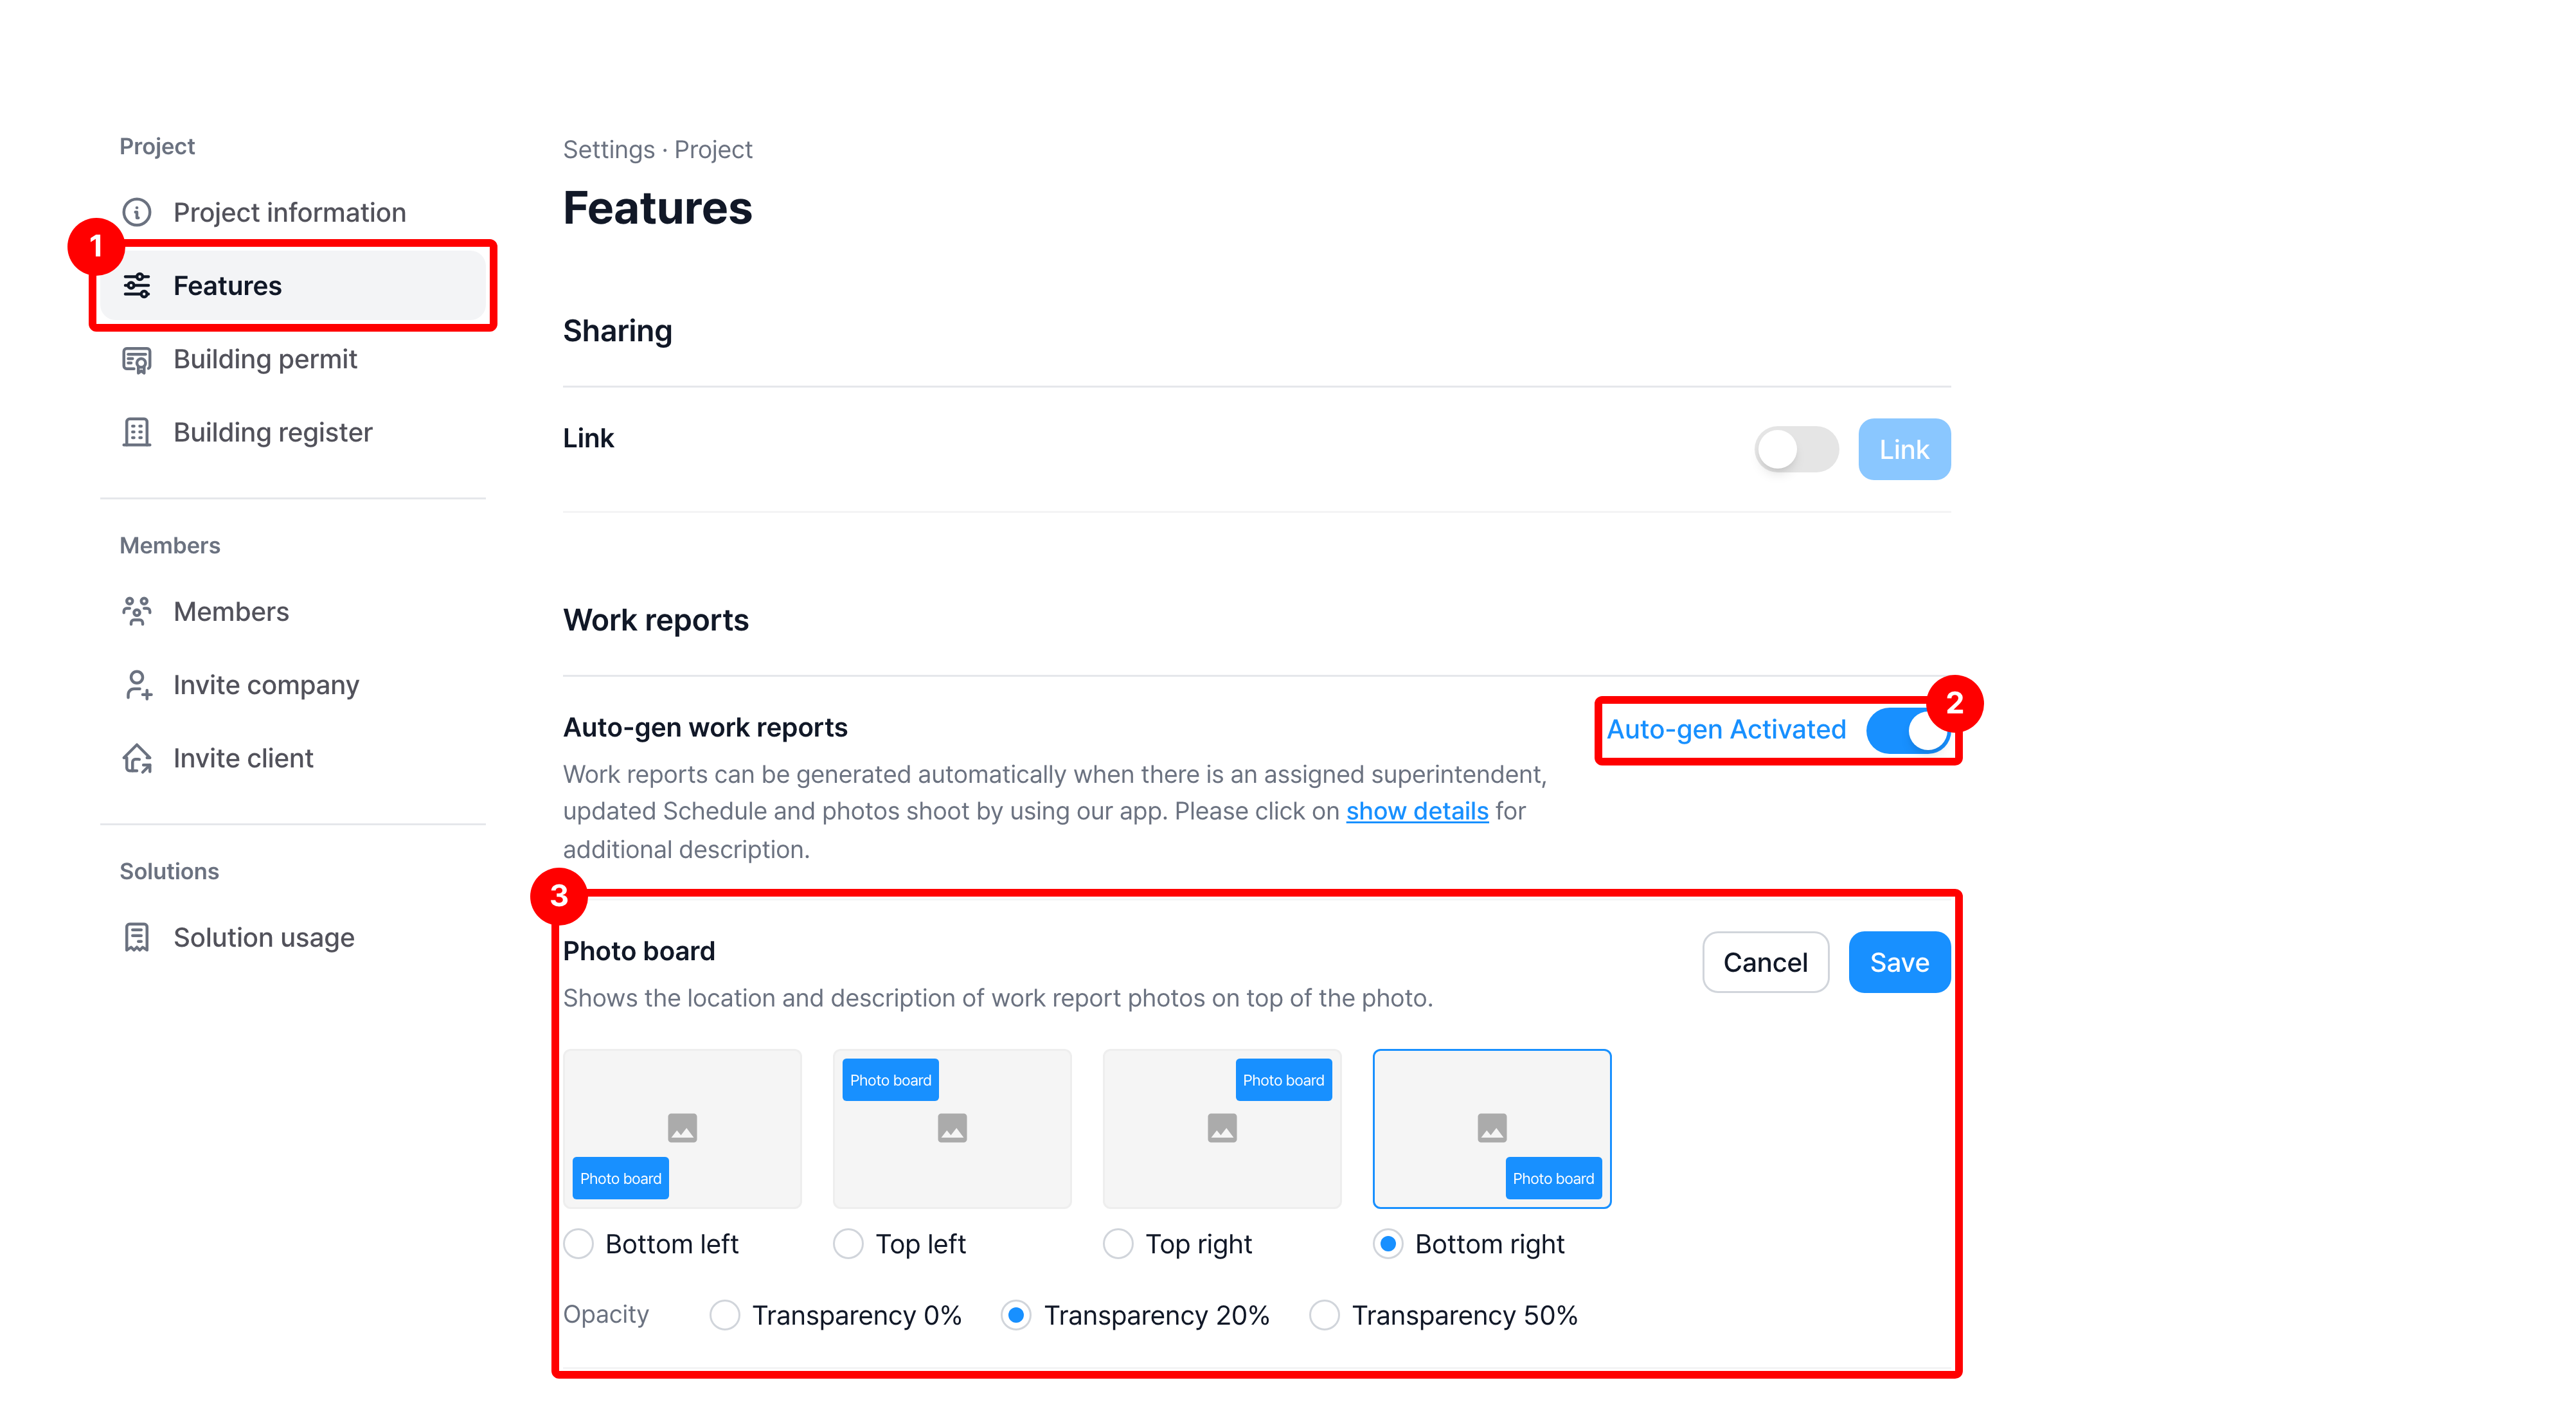
Required: The project is in progress, a site manager is assigned, and no work report has been written for today by 7 PM
| Today's scheduled process | Process photos taken on site | Generated automatically |
|---|---|---|
| O | O | O |
| O | X | O |
| X | O | O |
| X | X | X |
Share work reports externally
Work reports are meant to be shared only with project members, but sometimes people outside the project need to see them. In that case, you can share a work report with non-members through a shared link.
- You can turn on the shared link in the work report details in Project > Reports.
Open the More menu at the top right of the work report details, turn on Activate shared link, then click Copy link.
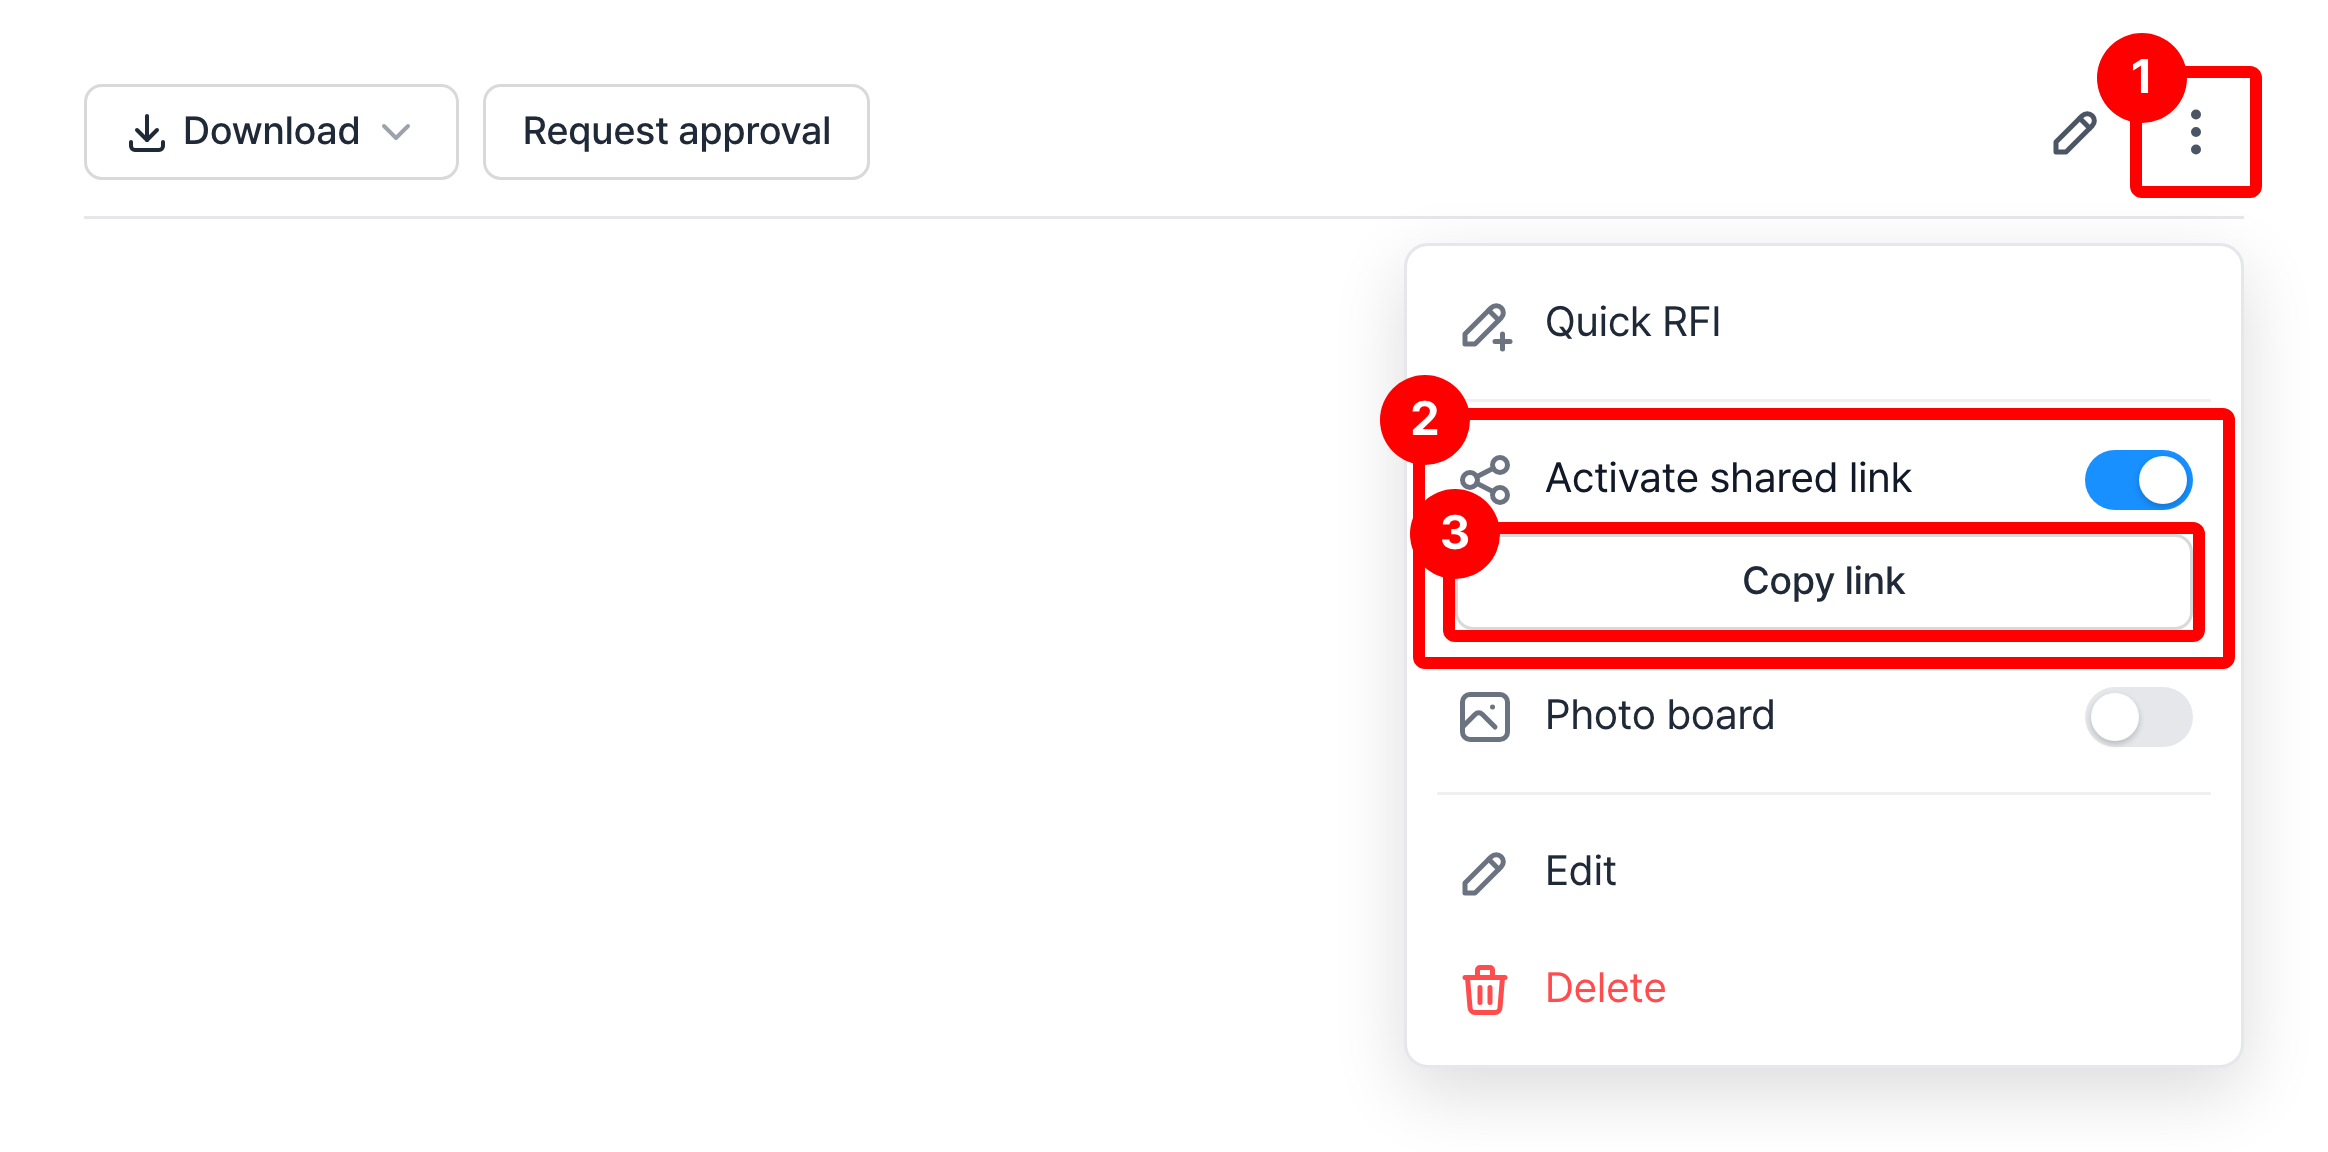
Send the copied link to the people you want to share it with.
Download work reports
You can download a work report from the work report details in Project > Reports.
Click Download and choose what to download.
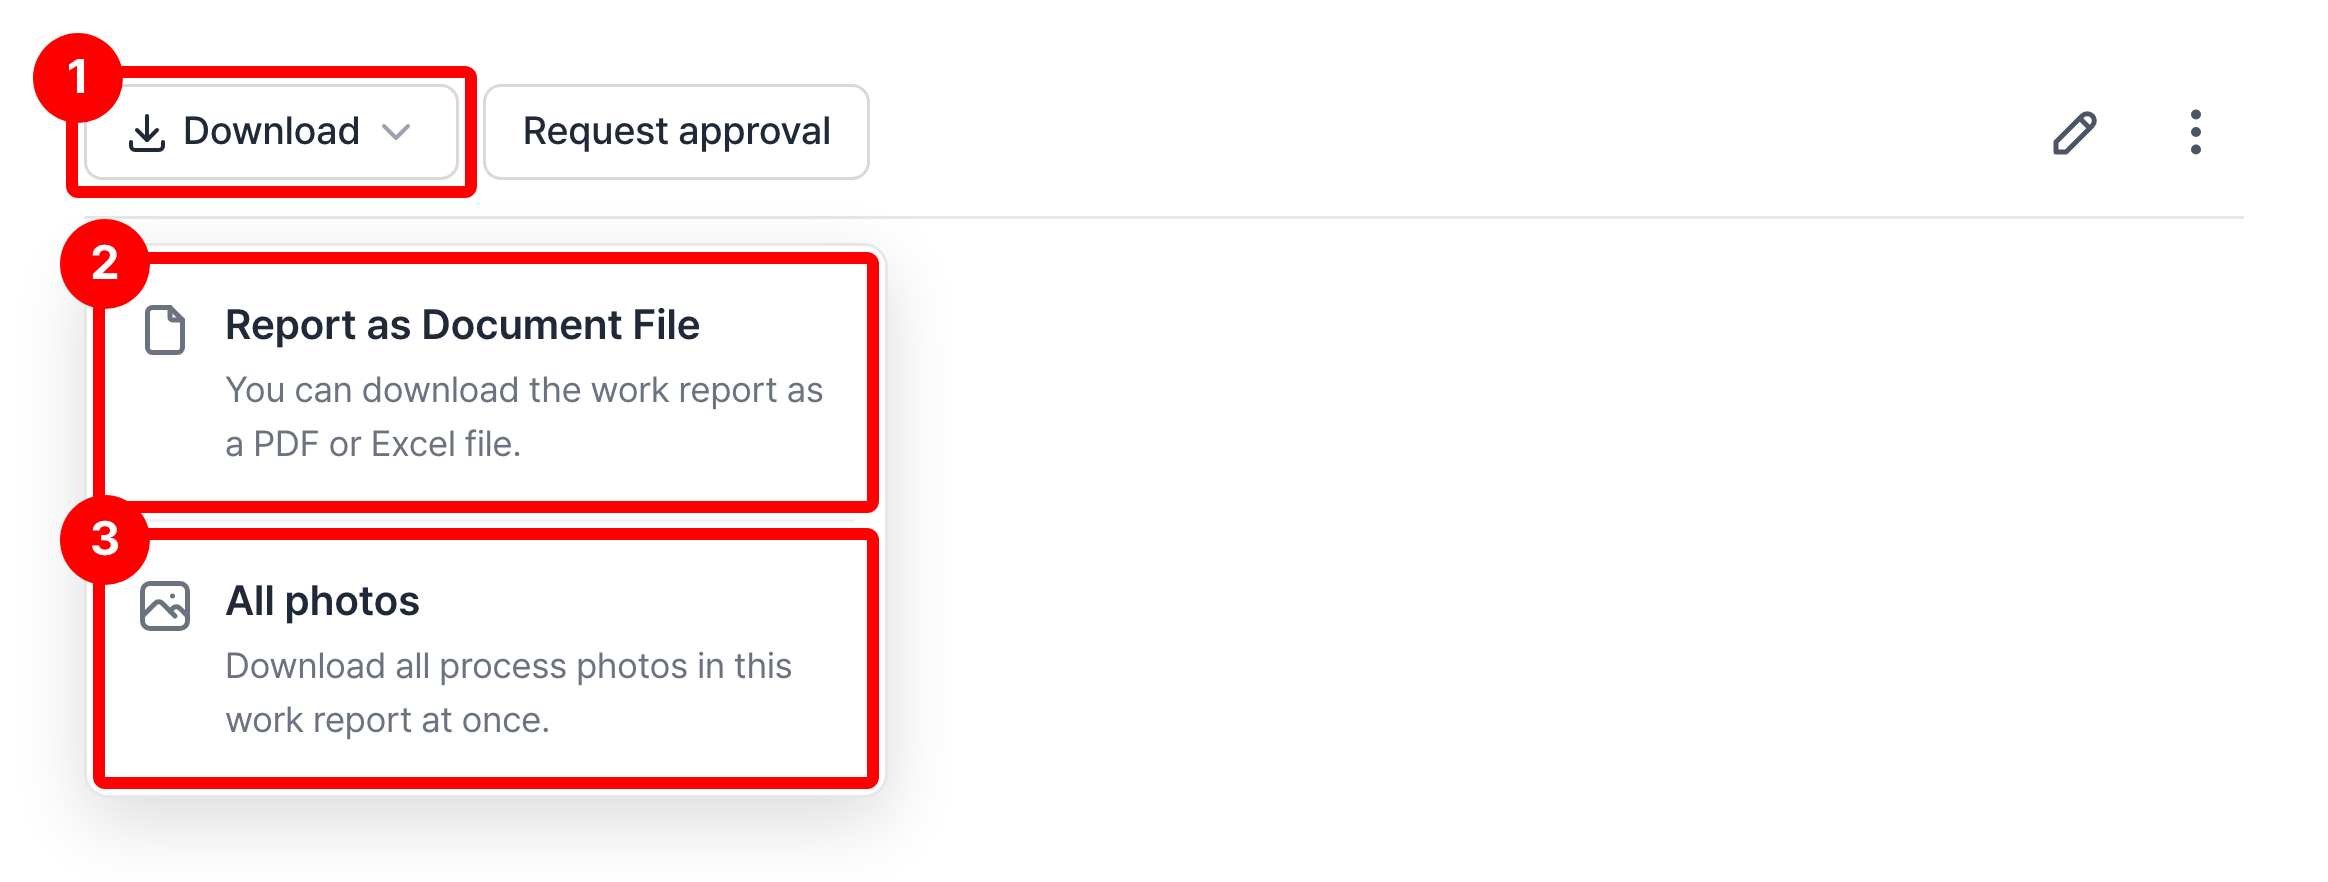
| Item | Description |
|---|---|
| ② Report as Document File | Downloads the work report as a document file such as PDF or Excel. |
| ③ All photos | Downloads all process photos in the work report at once. |