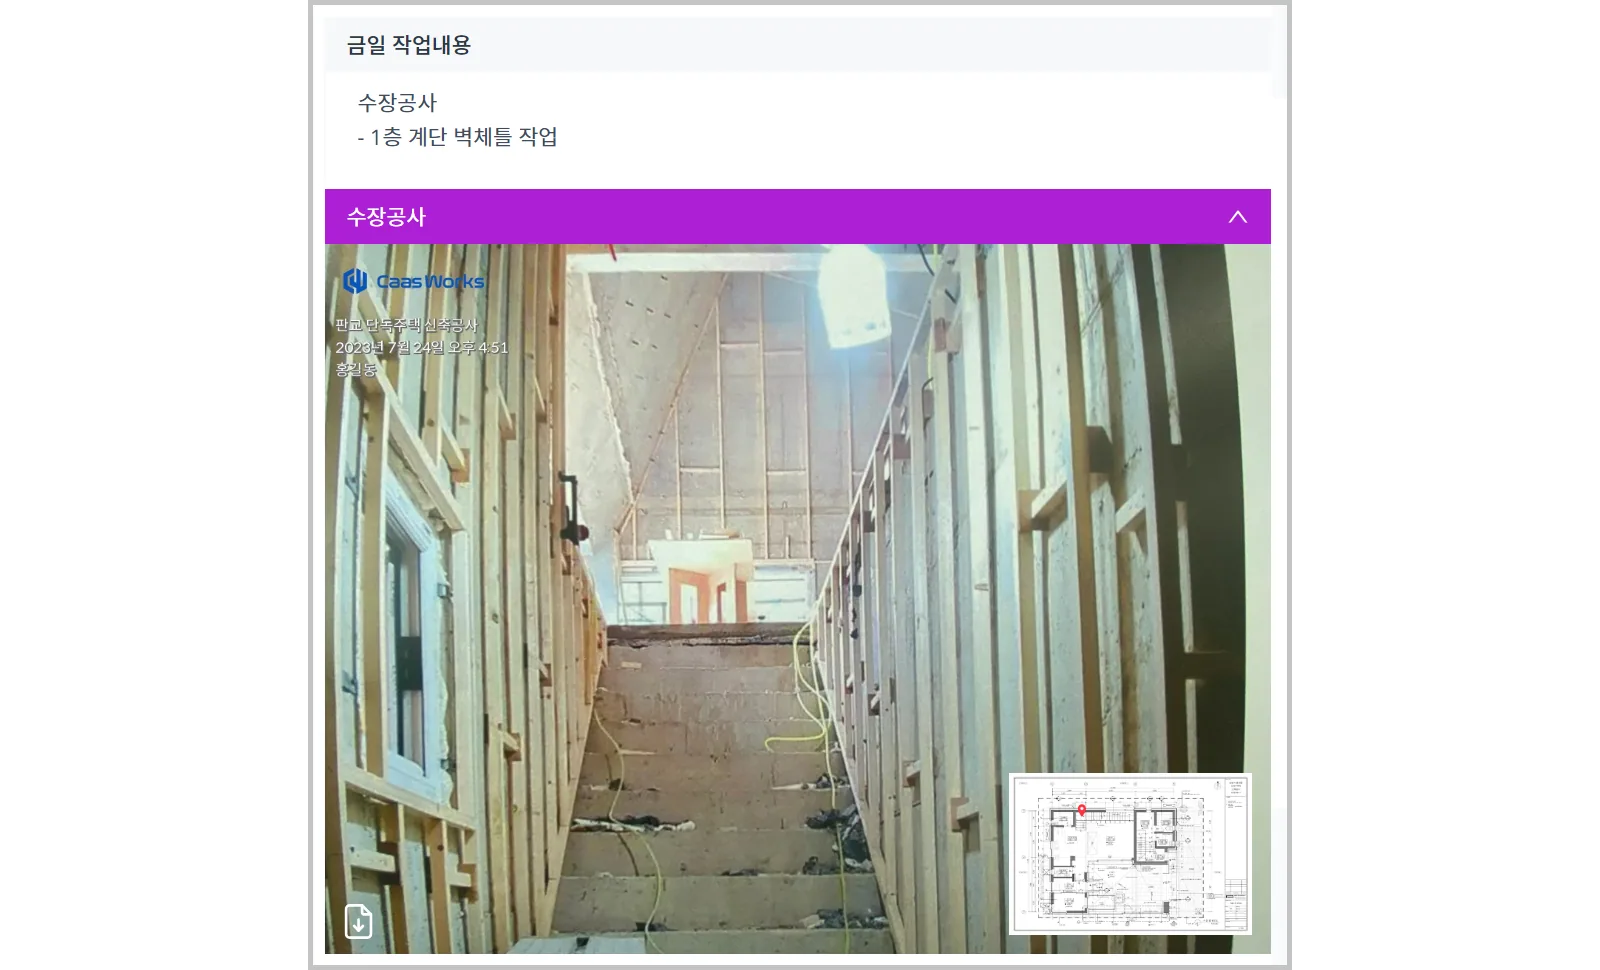
Photo board and watermark
Last updated: 2023.7.25
You can show a photo board and a watermark on work report photos so that the work can be understood from the photo alone. This helps when you prepare reports, and also for additional work or maintenance after construction is complete.
Use the photo board to tell the process and work details apart, and use the watermark, whose key item is the date and time the photo was taken, to verify the integrity and authenticity of photos.
Photo board settings
- You can set up the photo board in the Project > Reports menu.
- Turn on the Preview photo board switch.
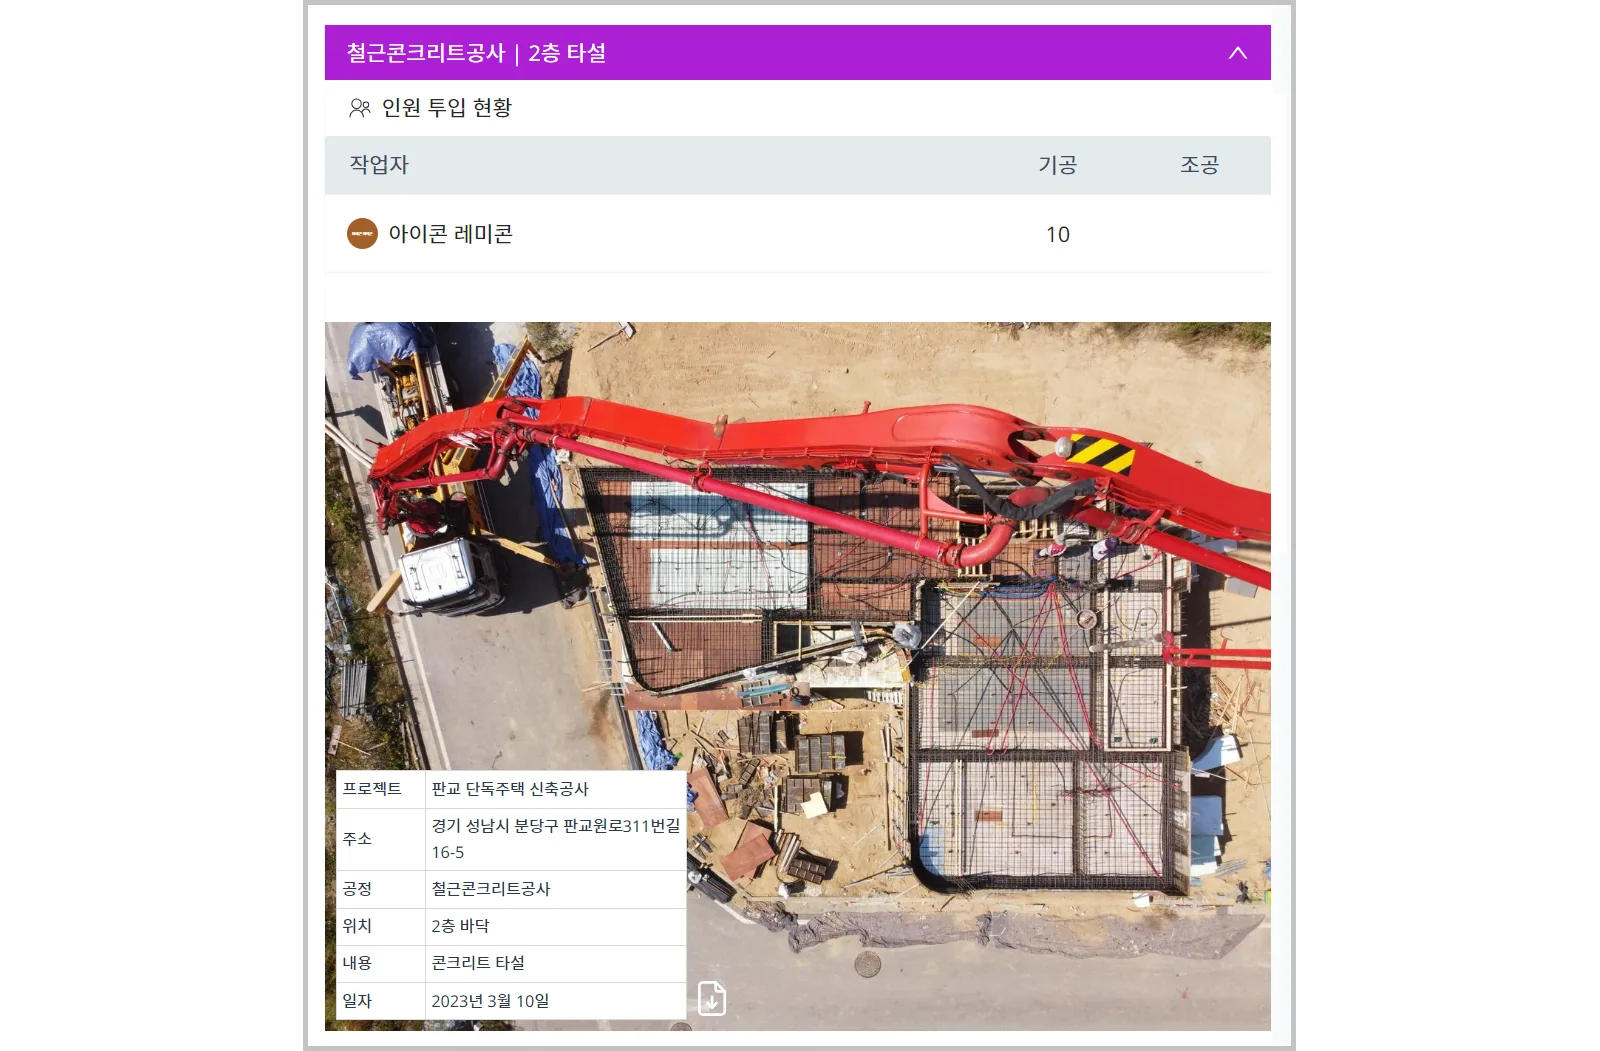
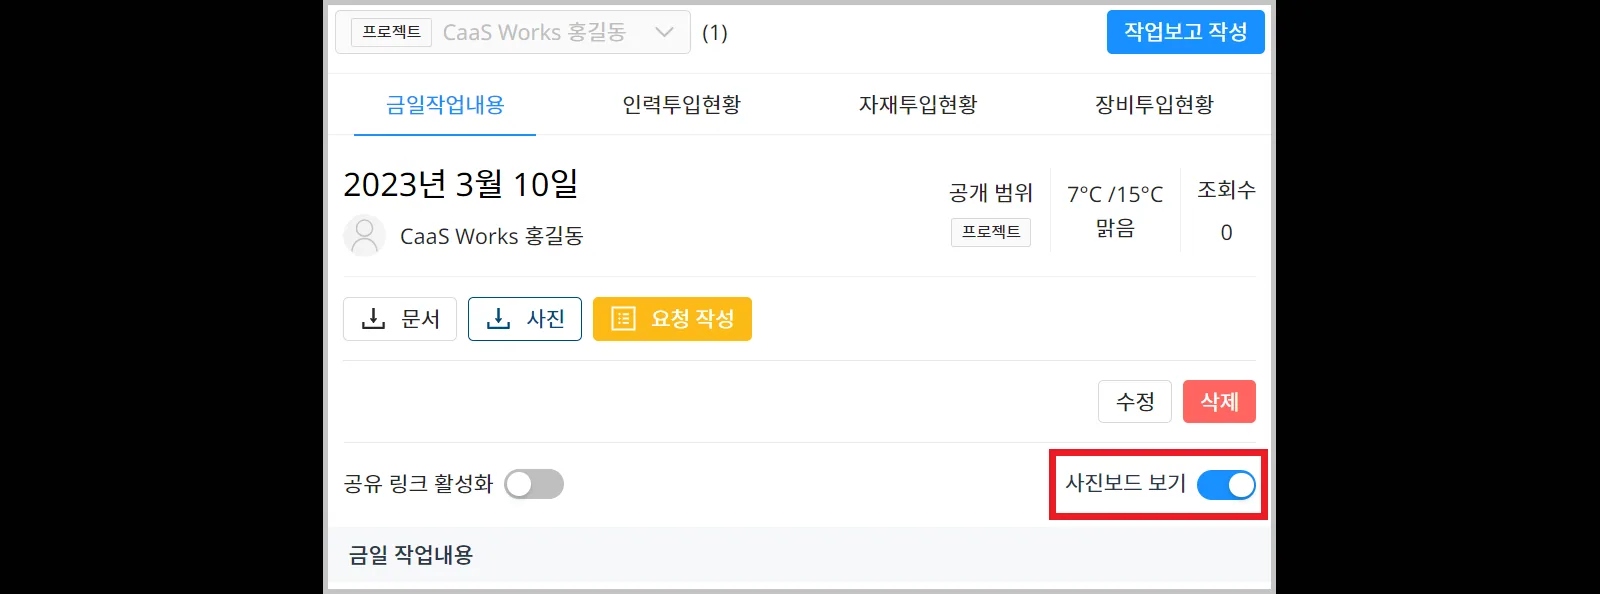 Photo board example
Items shown on the photo board
Project title, site address, process, work location, work details, work date
※ Location and details are not shown if they are empty.
Adjust the photo board position and transparency
- You can set the photo board position and transparency in the Project > Settings > Features menu. Only the project owner can change them.
Click All menus on the left of the top menu bar, then click Features in the Settings category.
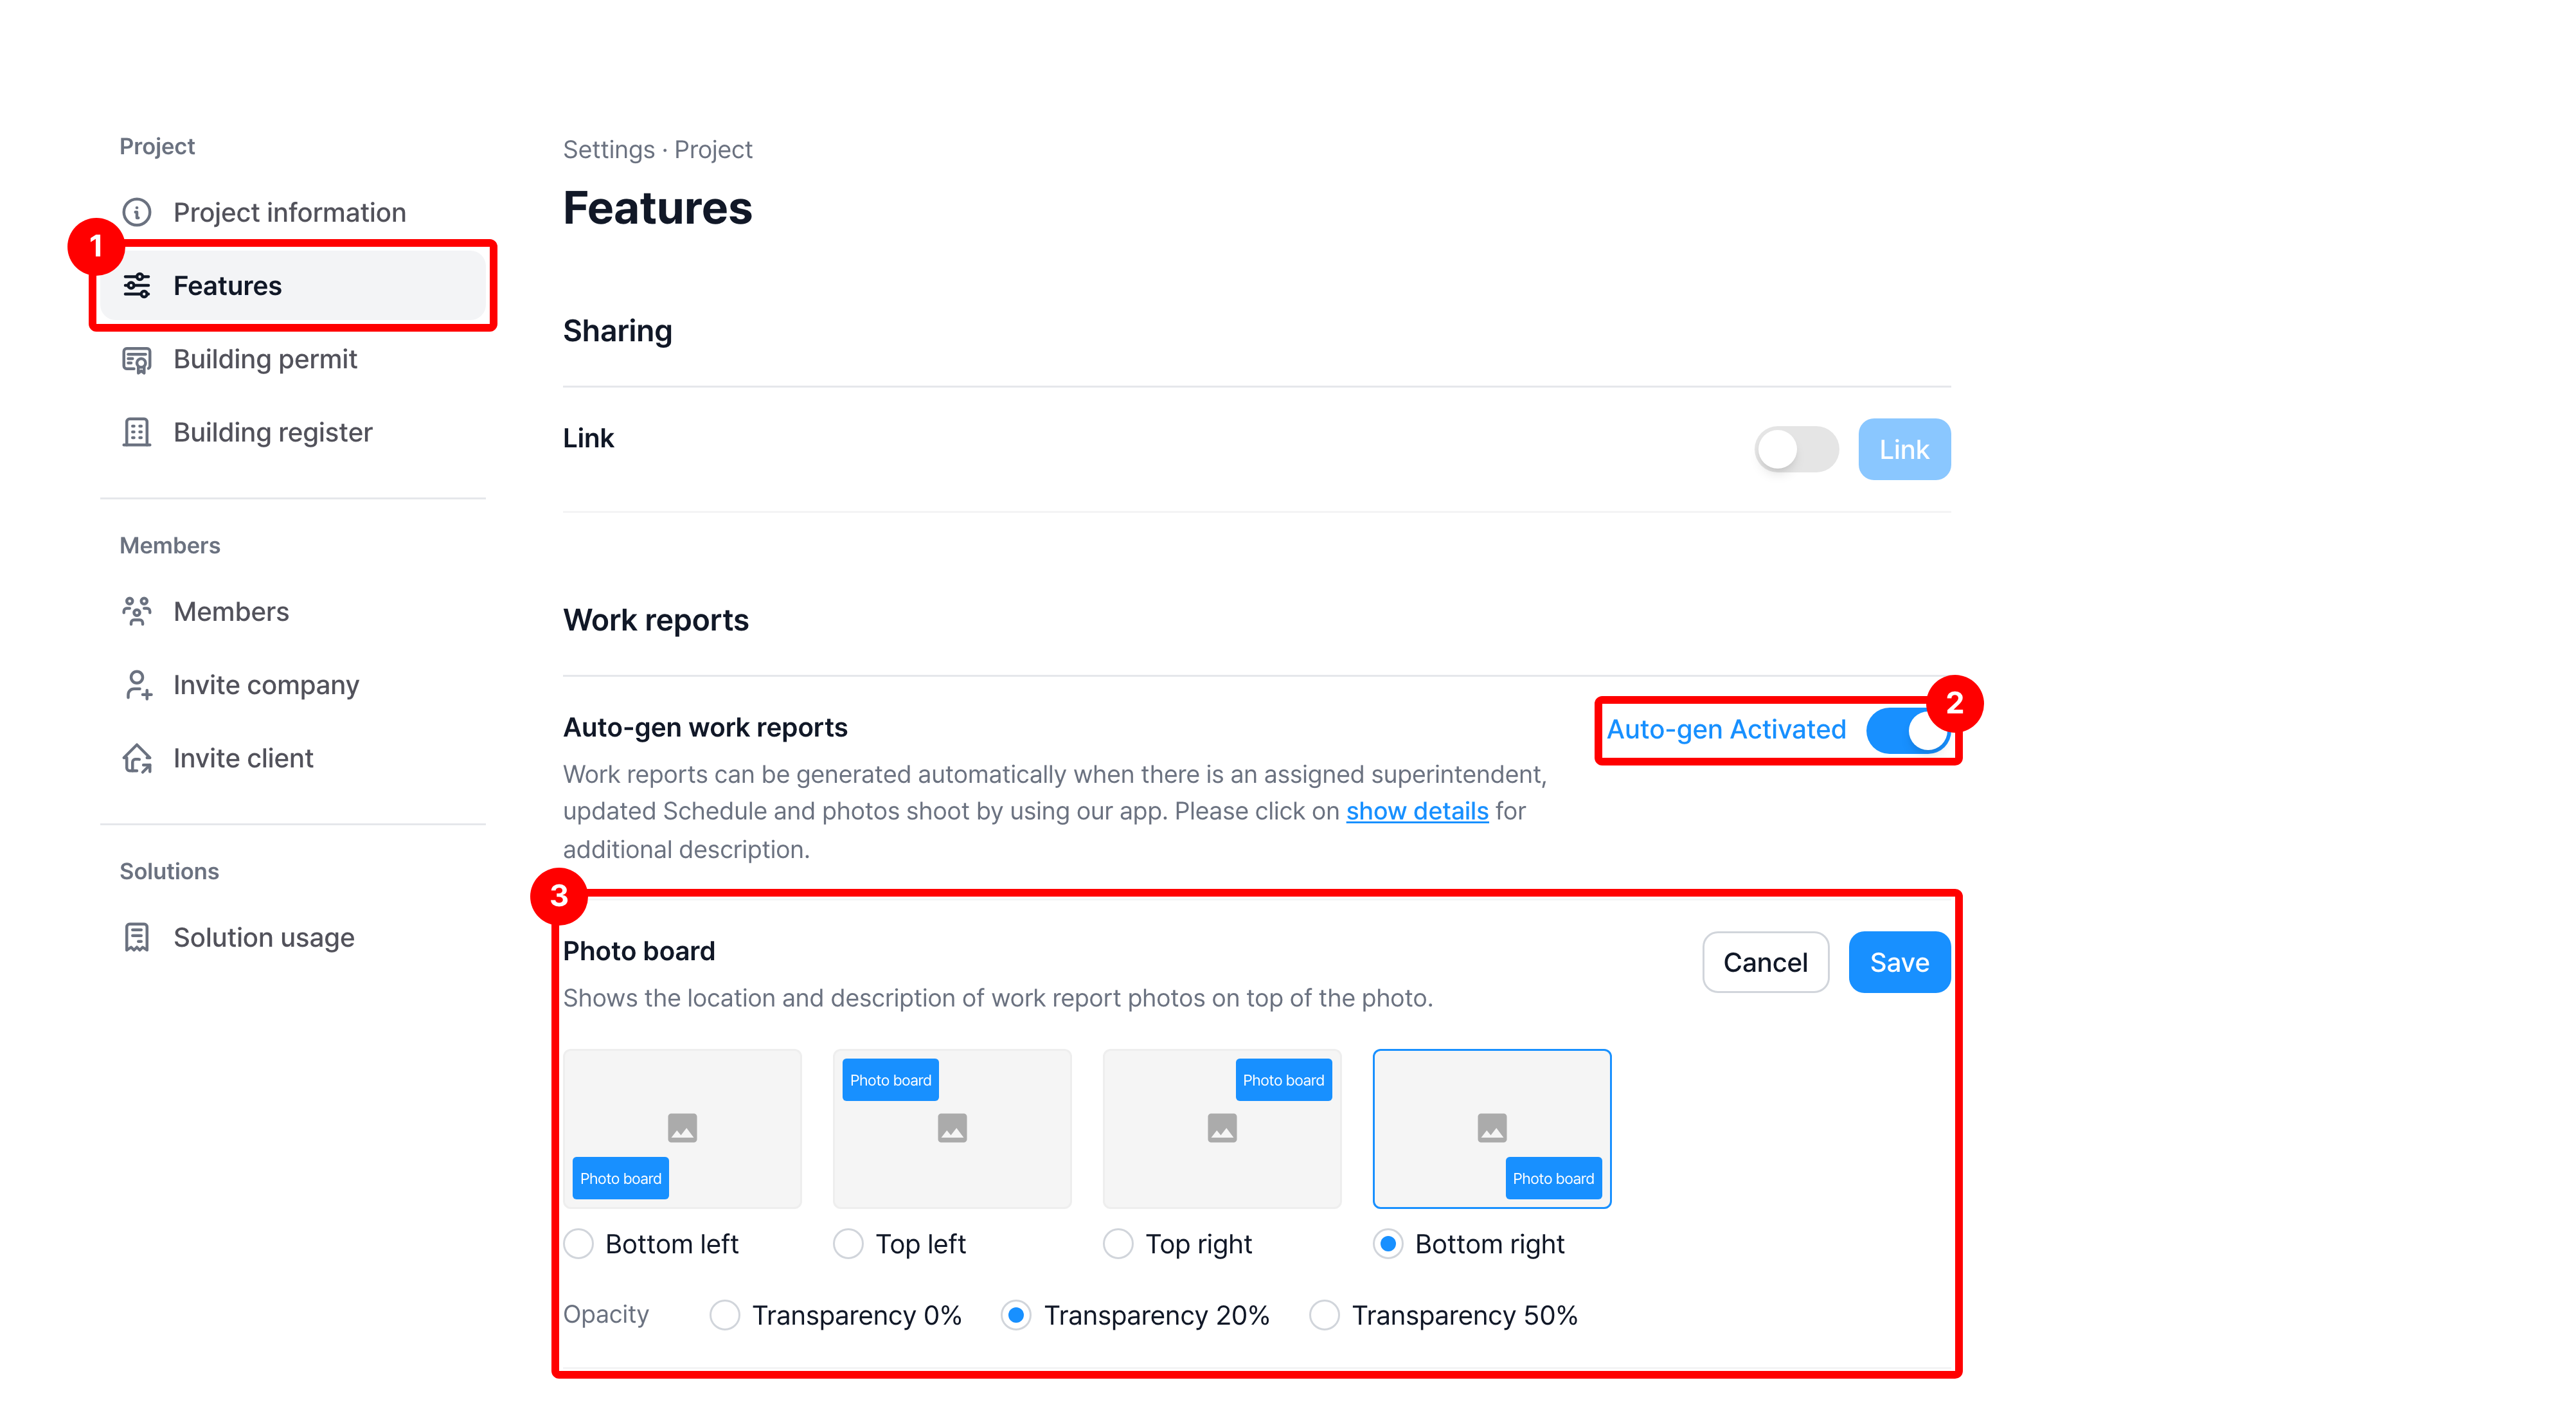
Select the position and transparency of the photo board, then click Save.
Cancel and Save appear when you change a value. Your selection shows right away, but the position and transparency are saved together only when you click Save.
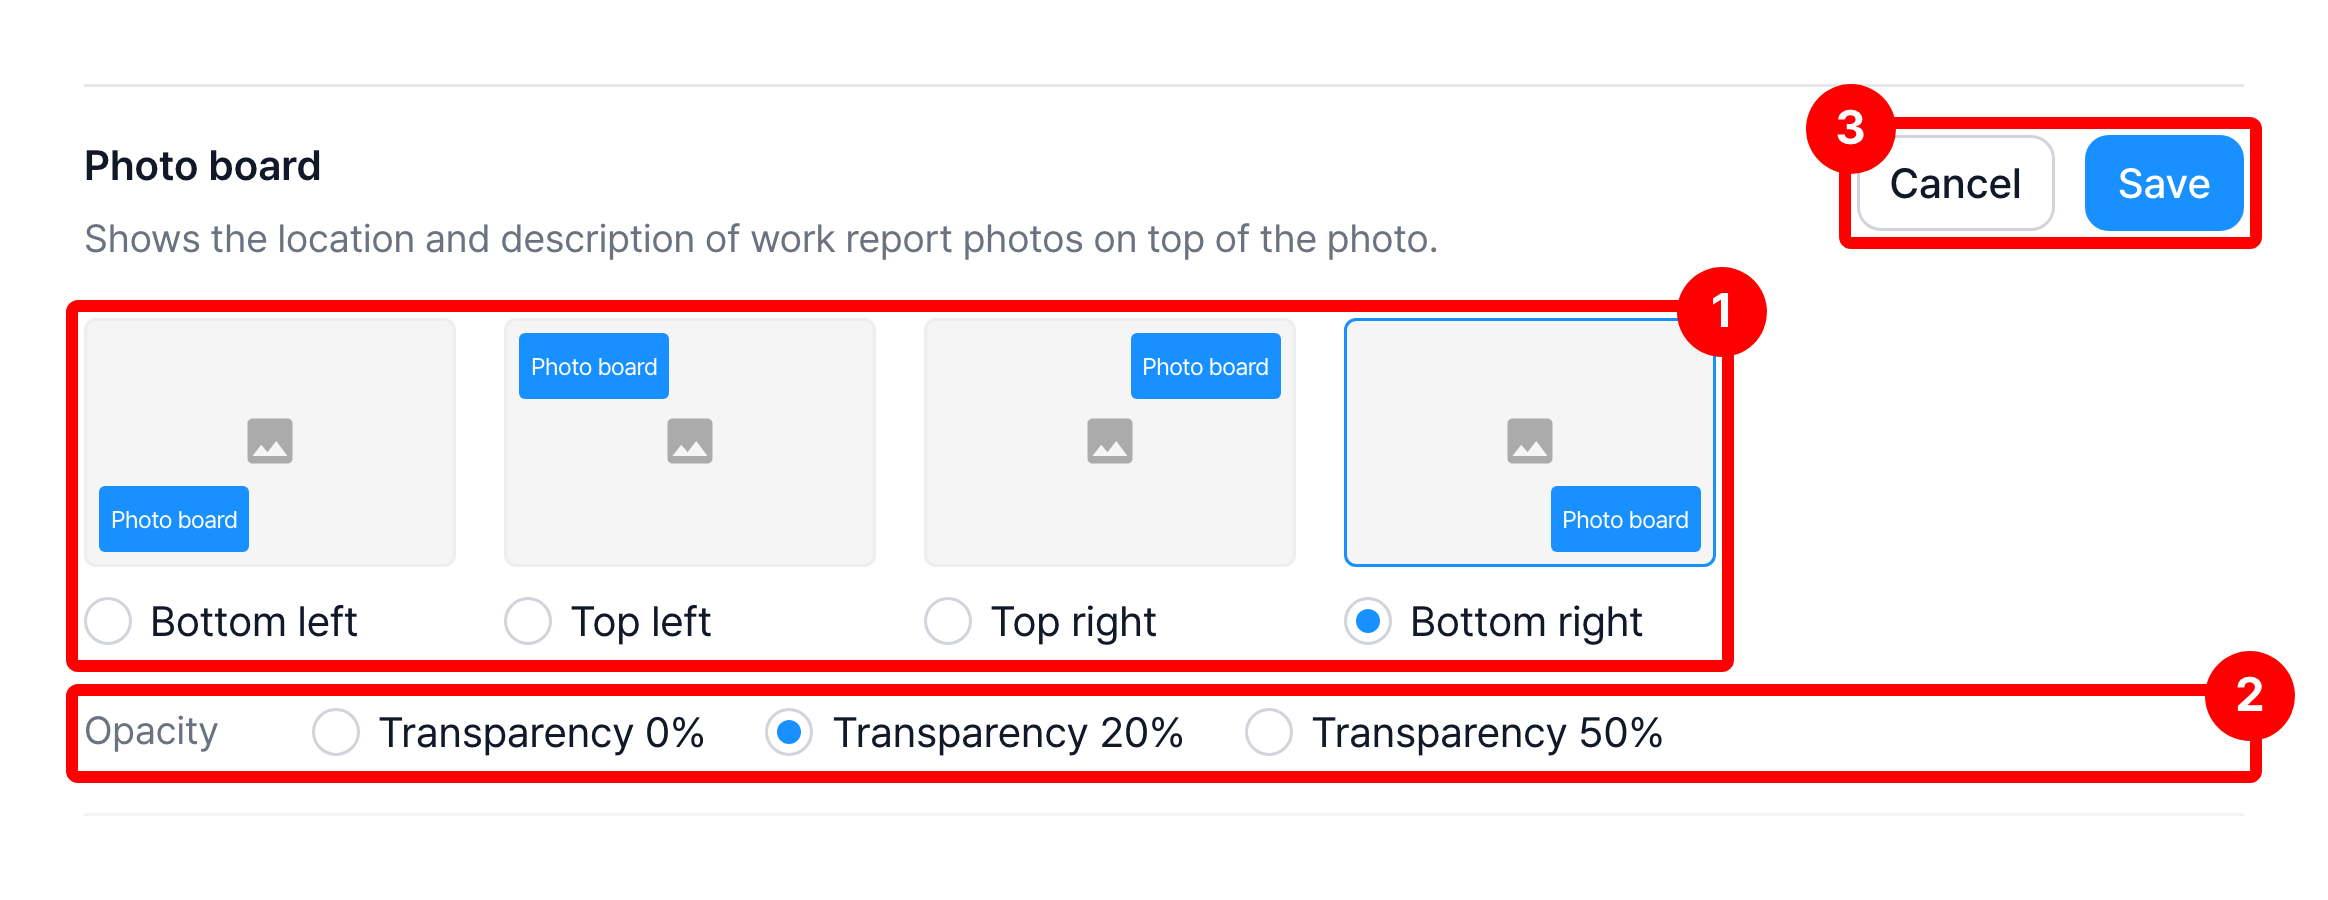
| Item | Description |
|---|---|
| ① Position | Select where to show the photo board (Bottom left · Top left · Top right · Bottom right) |
| ② Transparency | Adjust the photo board transparency (0% · 20% · 50%) ※ 0% transparency is fully opaque with a white background. |
| ③ Save | Save the selected position and transparency at once ※ Click Cancel to go back to the saved values |
Set up the watermark and adjust its position and transparency
- You can set up the watermark in Profile > Privacy. (The watermark can only be shown on photos taken with the CaasWorks mobile app.)
- Turn on the Watermark switch.
Caution⚠️ Once a watermark is created, it cannot be edited or deleted.
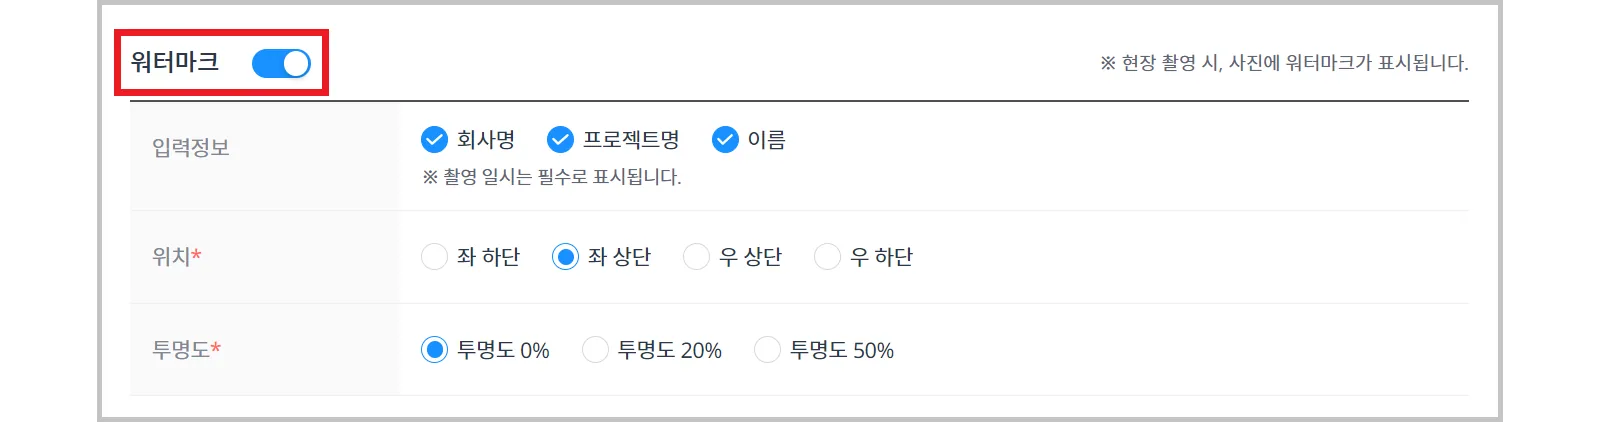
- Set the information to show on the watermark, its position, and its transparency.
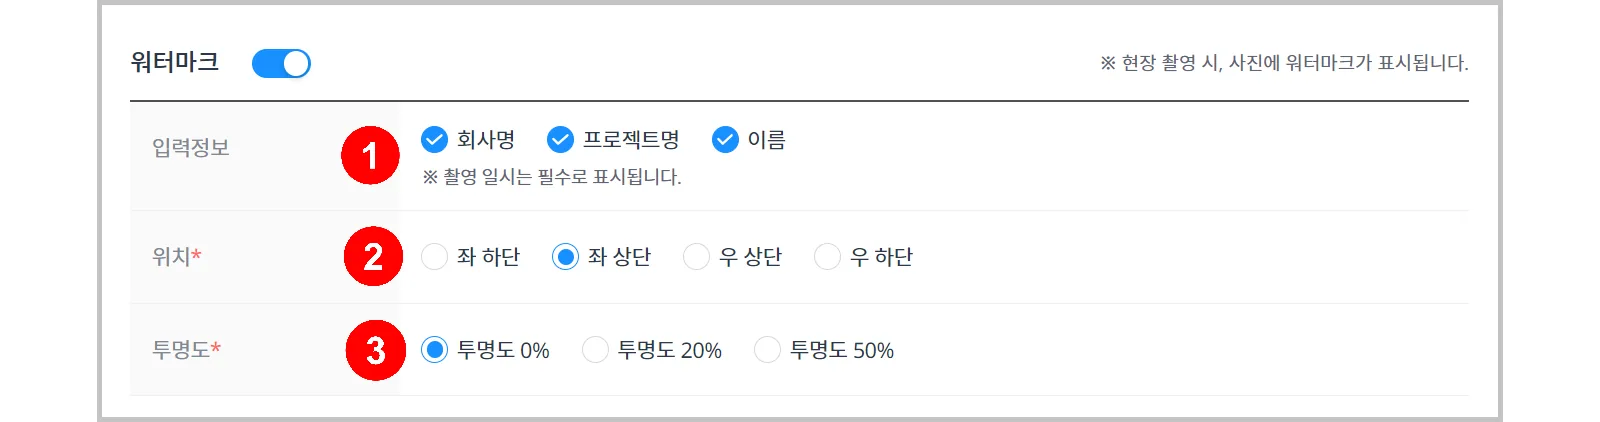
| Item | Description |
|---|---|
| ① Inputs | Select the items to show on the watermark (the shooting date and time is required) ※ Three watermark items 1. Project title 2. Company name 3. Photographer (To use the company logo instead of the company name, register the logo in Company Information.) |
| ② Position | Select where to show the watermark |
| ③ Transparency | Adjust the watermark transparency ※ 0% transparency is fully opaque with a white background. |