Invite a client
Last updated: 2026.11.9
Invite the client to the project to share site records and collaborate.
Buy the client app
- You can buy the product in the Smart Solution > Products menu. Buy the client app (HausPlanner) ➡️
In a project without a client app, Invite client takes you to the client app (HausPlanner) purchase screen.
- Click the client app (HausPlanner) product.

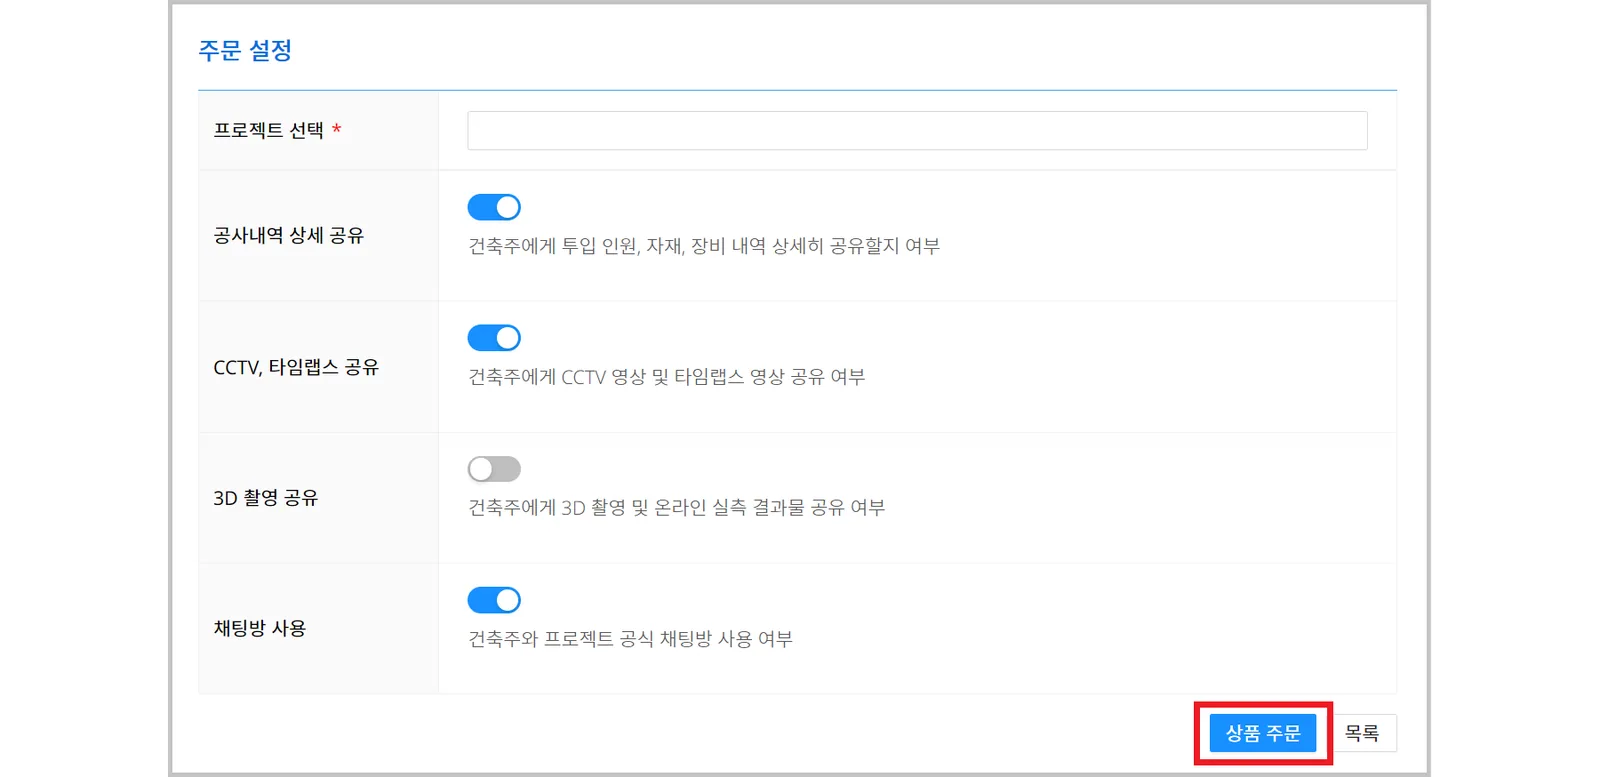
- Set the order information, then click Product order.
You can set how much information is shared with the client.
Invite the client
- You can invite the client in the project Settings > Invite client. The Invite client menu is shown only to the company that owns the project.
Click All menus on the left of the top menu bar, then click Invite client in the Settings category.
You can also open the same screen with the Invite client icon at the top right of the project screen, or with the Manage Client button at the bottom of Members.
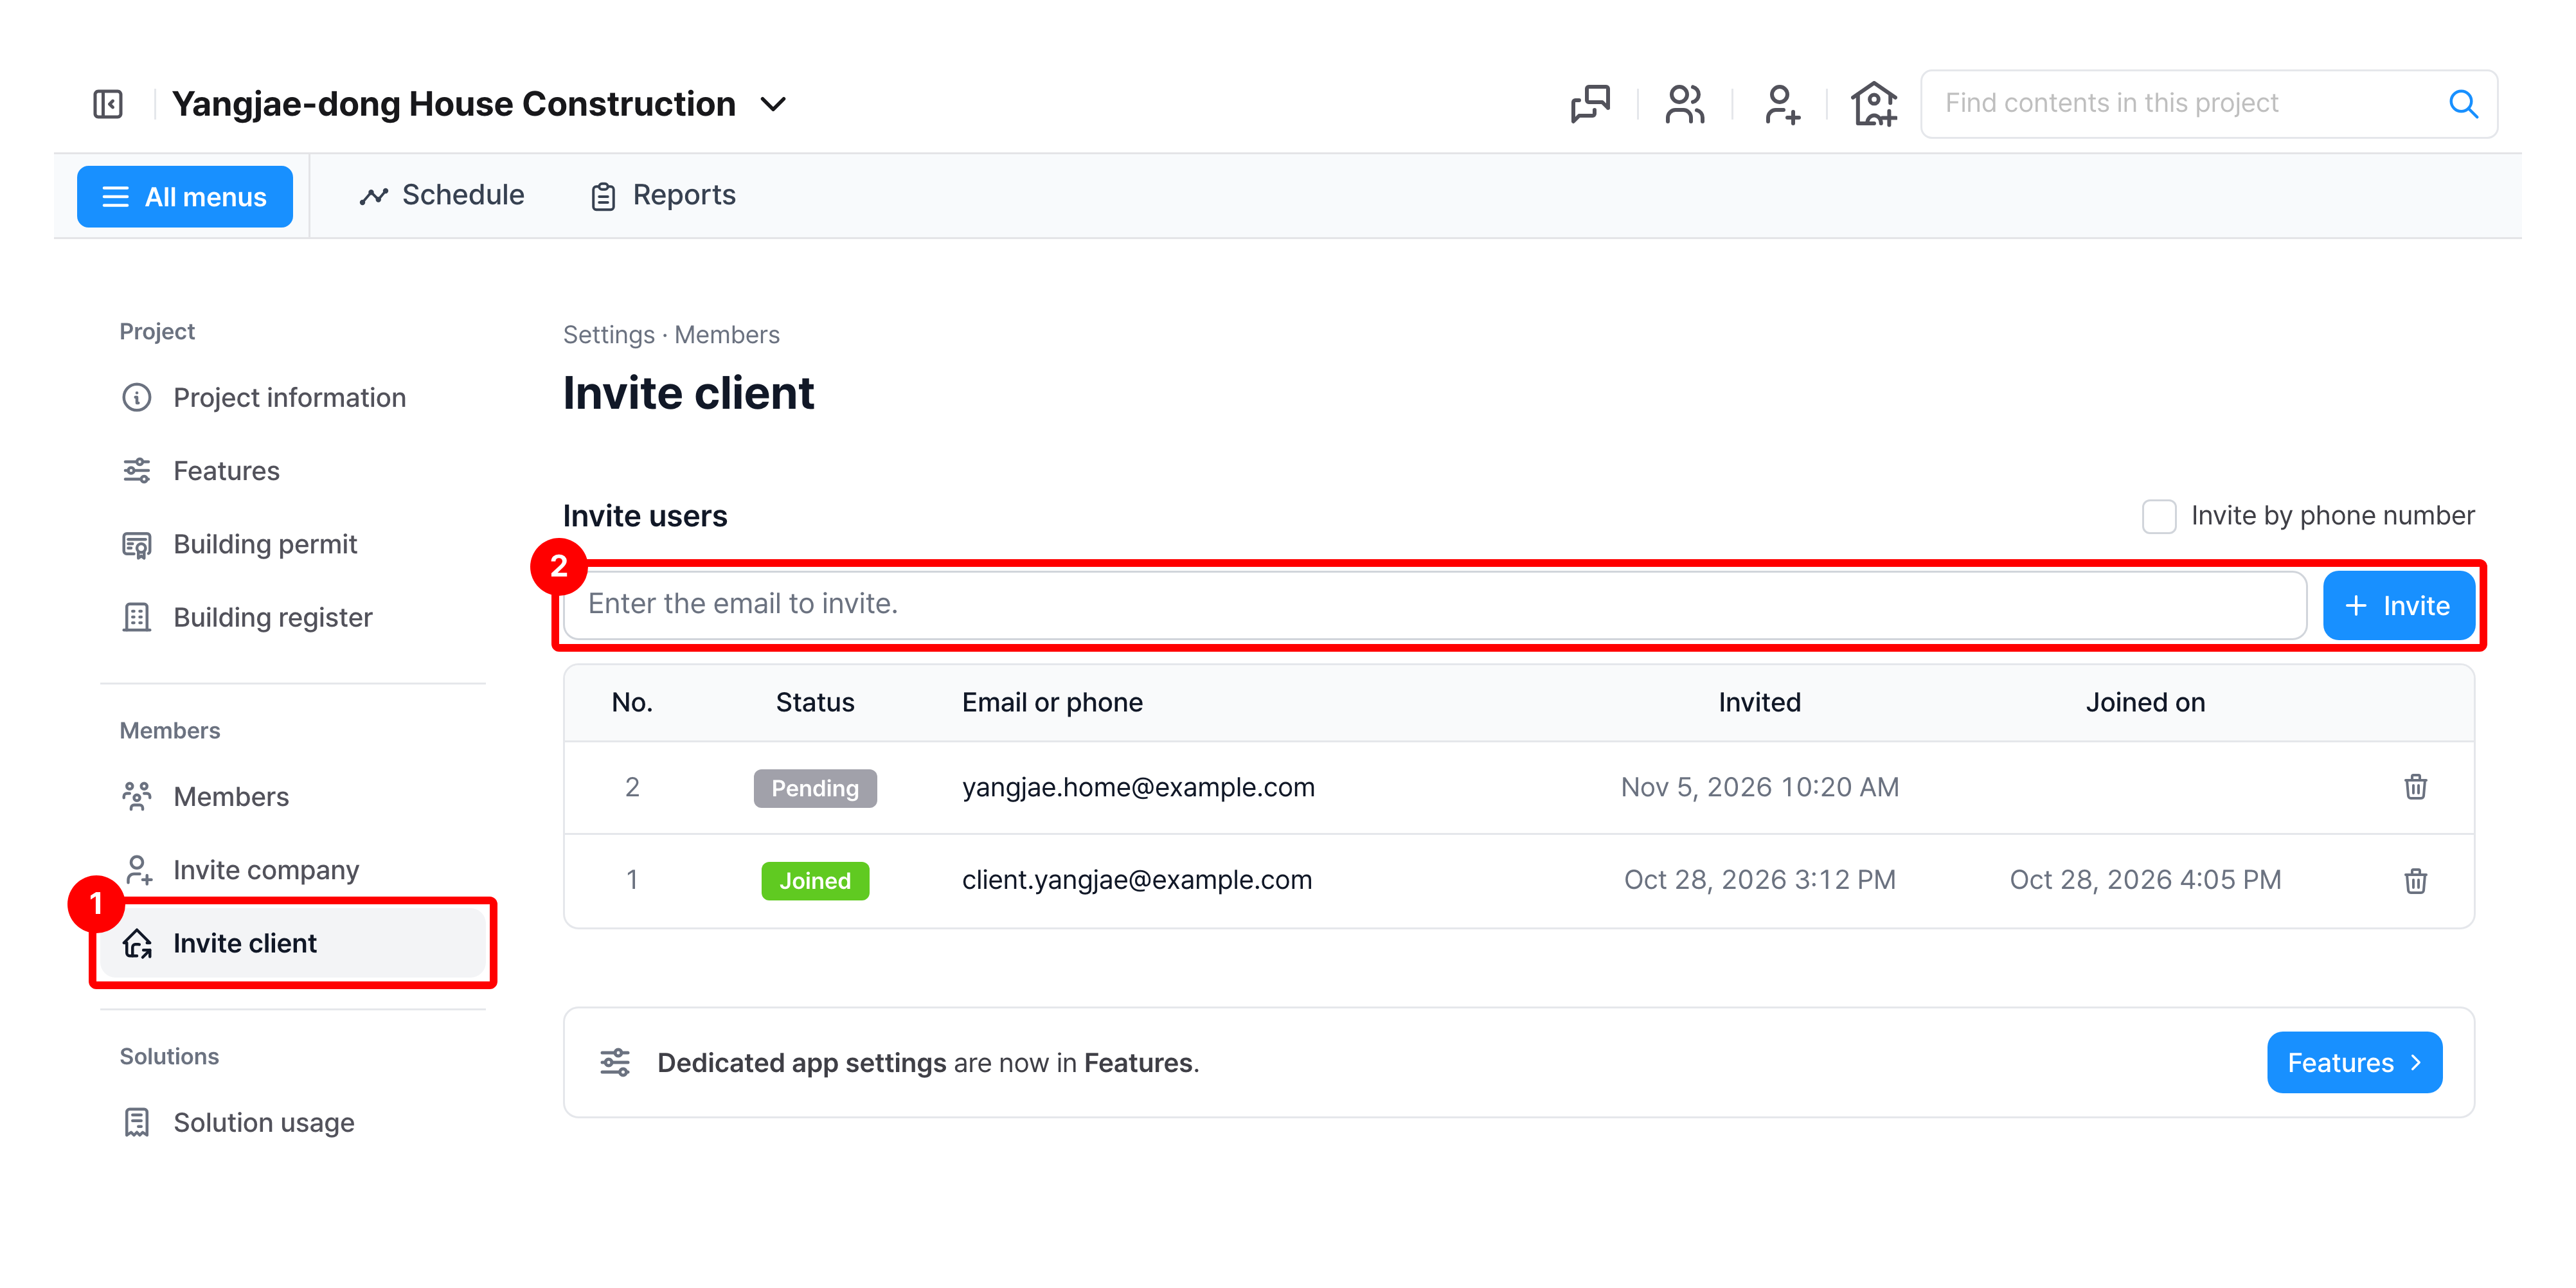
Enter the client's email, then click Invite. To invite by phone, select Invite by phone number and enter the phone number.
A client app member joins the project as soon as they are invited.
If you invite a client who has not signed up yet, they are invited in a pending state and can join the project as soon as they finish signing up.
Invited clients appear in the table below as Pending or Joined. To cancel an invitation, click the delete icon at the end of the row.
Client app settings such as sharing detailed construction history, sharing CCTV and timelapse, and using the chat room are in the Client app section of Settings > Features.